
Brevo is an all-in-one marketing platform that offers email marketing, SMS marketing, and marketing automation services. It is designed to help businesses of all sizes create, send, and track their marketing campaigns easily and effectively.
There are several reasons why you might consider using Brevo for your marketing needs:
- Affordable Pricing: Brevo offers a range of affordable pricing plans to fit any budget, making it accessible for small businesses and startups.
- Easy-to-use Interface: The Brevo platform is user-friendly, with a drag-and-drop email editor, and intuitive campaign creation and management tools.
- Multi-channel Marketing: Brevo provides both email and SMS marketing capabilities, allowing businesses to reach their customers through multiple channels.
- Automation Features: Brevo’s automation features allow businesses to create sophisticated workflows that can help streamline their marketing efforts and save time.
- Unlimited Contacts: One of the most significant benefits of using SendinBlue is its unlimited contacts feature. Unlike many other email marketing platforms, Brevo does not limit the number of contacts you can have in your account, making it an ideal solution for businesses with large contact lists.
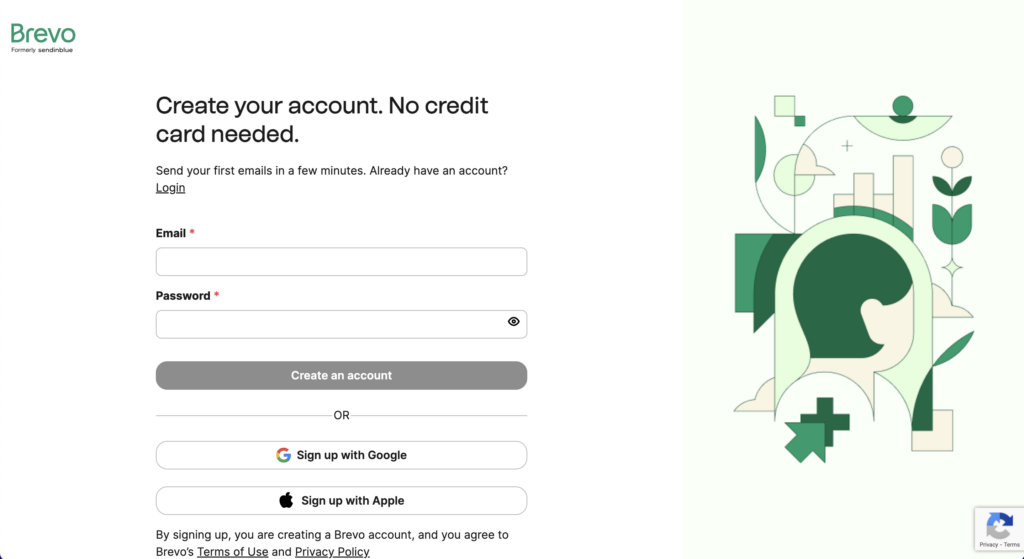
Register for a Brevo Account
If you haven’t already registered for a Brevo account, you’ll need to do so before proceeding with the integration. You can create a free account on the Brevo website.
Retrieve your Brevo API key
To retrieve your SendinBlue API key, log in to your SendinBlue account, navigate to the SMTP & API page and copy the API key. This key will be used to authenticate your Campoal account with Brevo.
To generate a Brevo API key, please follow these steps:
Step 1: Log in to your Brevo account Go to the Brevo website and log in to your account using your credentials.
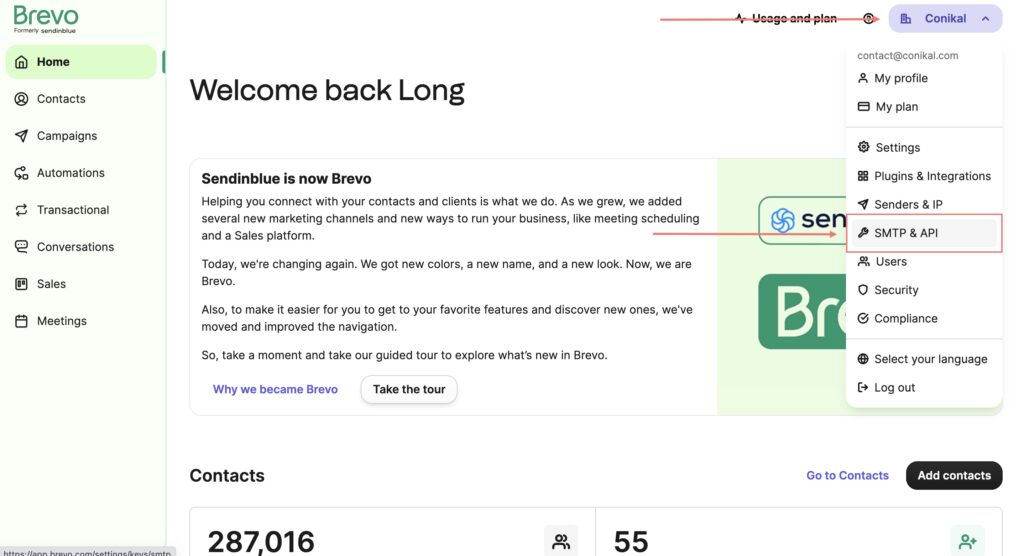
Step 2: Navigate to the SMTP & API page Once you are logged in, click on your account name in the top right corner of the screen and select “SMTP & API” from the dropdown menu.
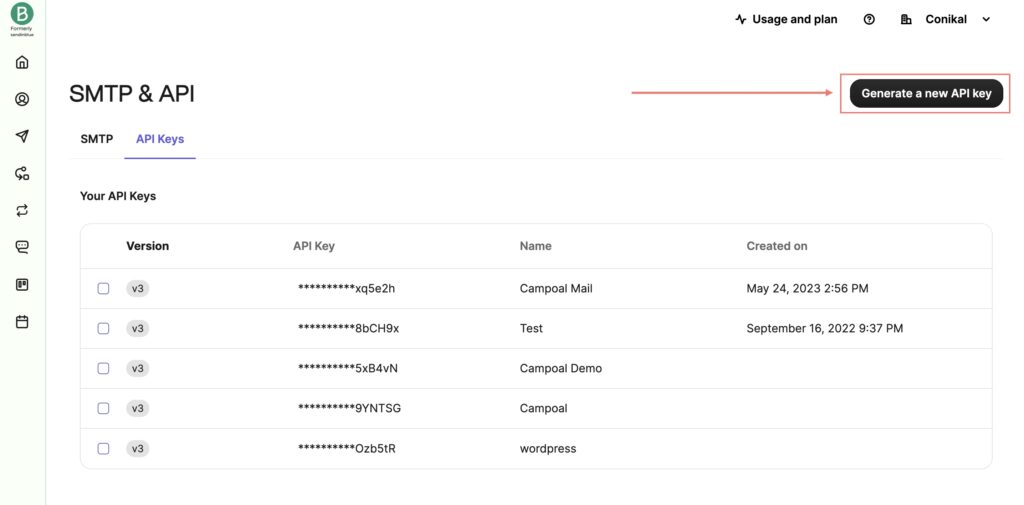
Step 3: Generate a new API key On the SMTP & API page, you should see a section called “API v3 keys”. Click on the “Create a new key” button to generate a new API key.
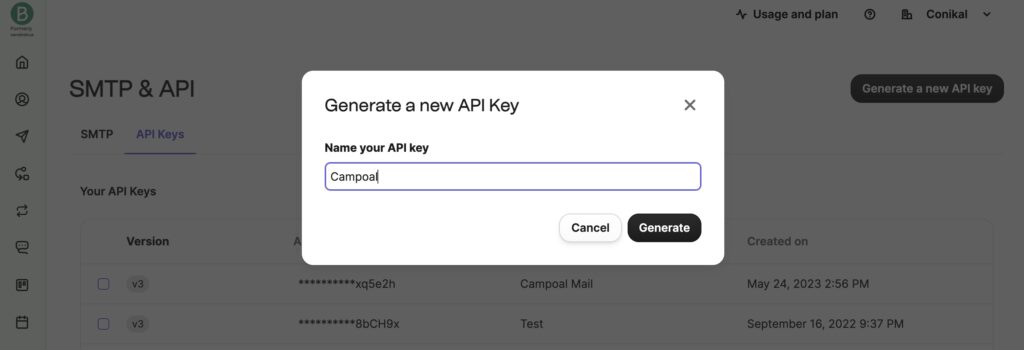
Step 4: Name your API key In the pop-up window that appears, you will be asked to name your API key. Choose a name that is descriptive and easy to remember, then click “Create”.
Step 5: Copy your API key Once your new API key has been created, you should see it listed under the “API v3 keys” section of the SMTP & API page. Click on the “Show” button next to the API key to reveal it, then copy the key to your clipboard.
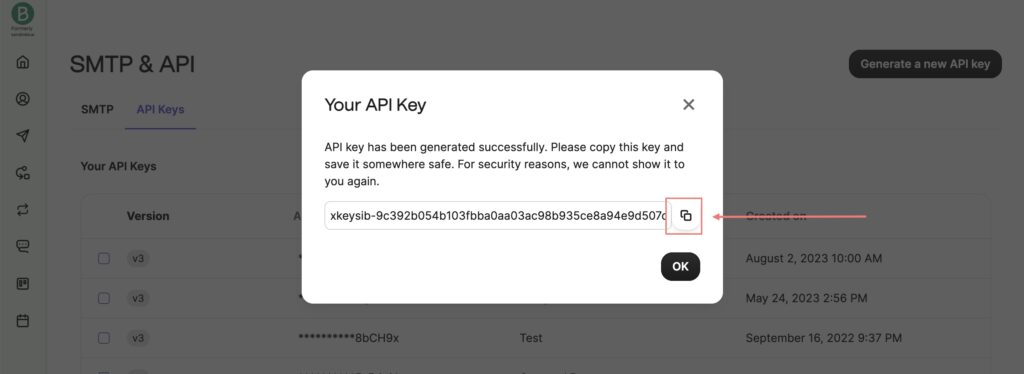
Your Brevo API key is now ready to use. You can use this key to authenticate with Brevo when integrating it with other platforms, such as Campoal or other email marketing tools. Remember to keep your API key confidential and secure, as it provides access to your Brevo account and data.
Retrieve your Brevo Folder ID
To retrieve your Brevo Folder ID, log in to your Brevo account, navigate to the Lists page and select the folder you want to use for the integration. The Folder ID can be found in the address bar of your browser, after “/lists/index/id/”. Copy this ID as it will be used in the Campoal integration.
To get your Brevo Folder ID, please follow these steps:
Step 1: Log in to your Brevo account Go to the Brevo website and log in to your account using your credentials.
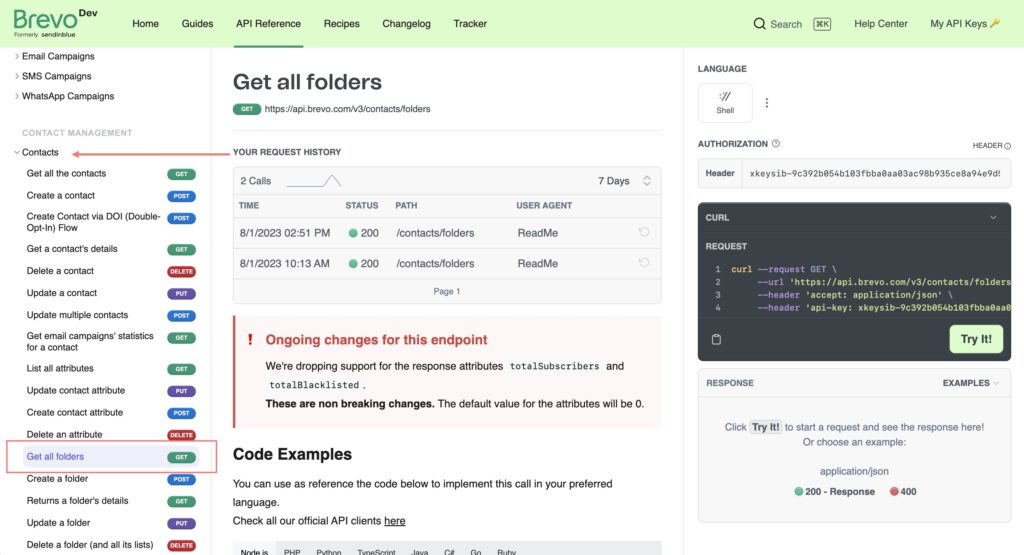
Step 2: Navigate to the API Documentation Once you are logged in, click on the “Contact > Get all folder” left side bar menu.
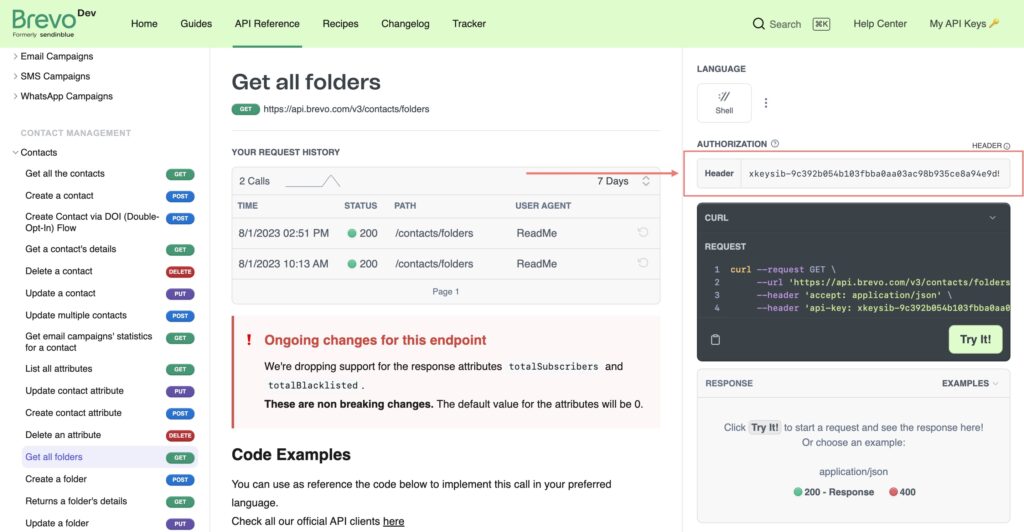
Step 3: Copy API key generated from previous step and paste into Authorization field.
Step 4: Click on button Try It to get response of all folders data, now you can see folder ID and more infomation about folder.
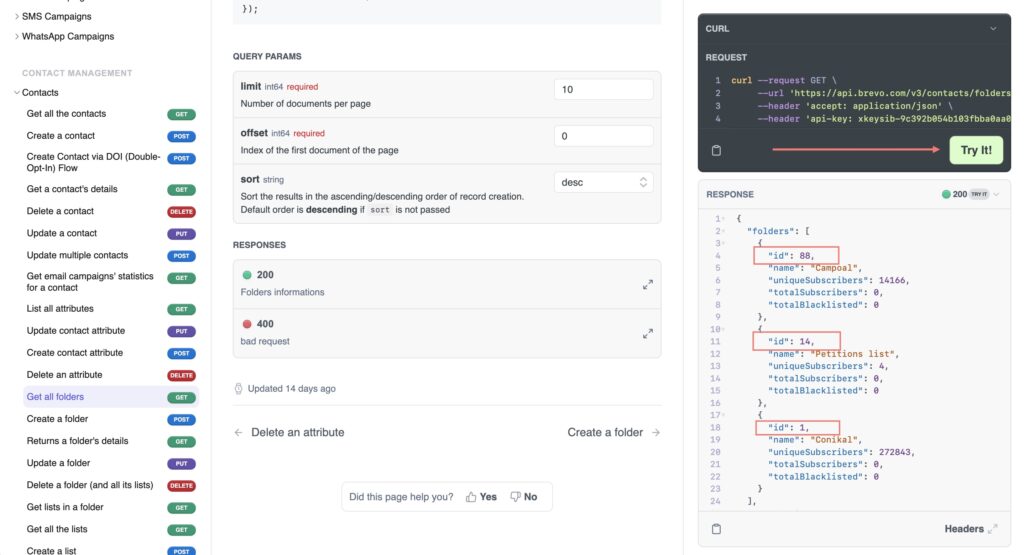
Step 5: Copy the Folder ID Copy the number at the response data.
Your Brevo Folder ID is now ready to use. You can use this ID when integrating Brevo with other platforms, such as Campoal or other email marketing tools.
Retrieve your Brevo Sender Email
To retrieve your Brevo Sender Email, log in to your Brevo account, navigate to the Senders page and copy the email address you want to use as the sender. This email address will be used to send emails from Campoal through Brevo.
To add a new sender to your Brevo account, please follow these steps:
Step 1: Log in to your Brevo account Go to the Brevo website and log in to your account using your credentials.
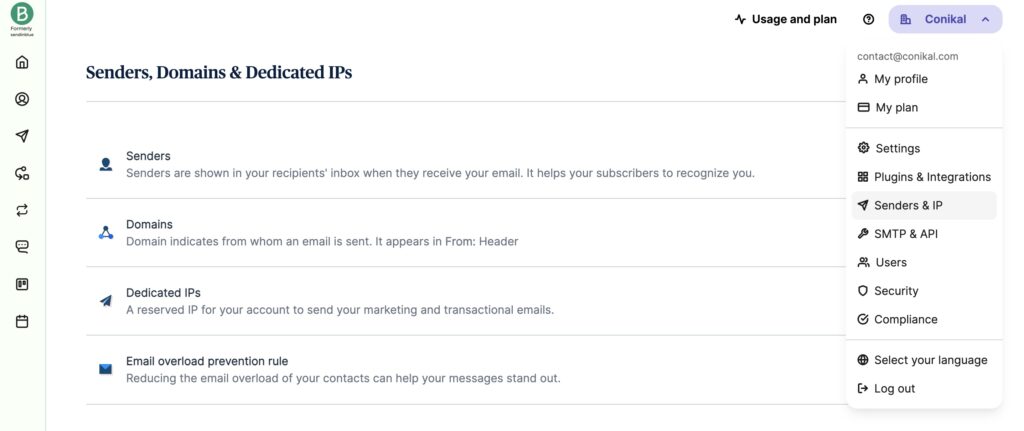
Step 2: Navigate to the Senders page Once you are logged in, click on the “Senders & IP” tab on the main navigation menu.
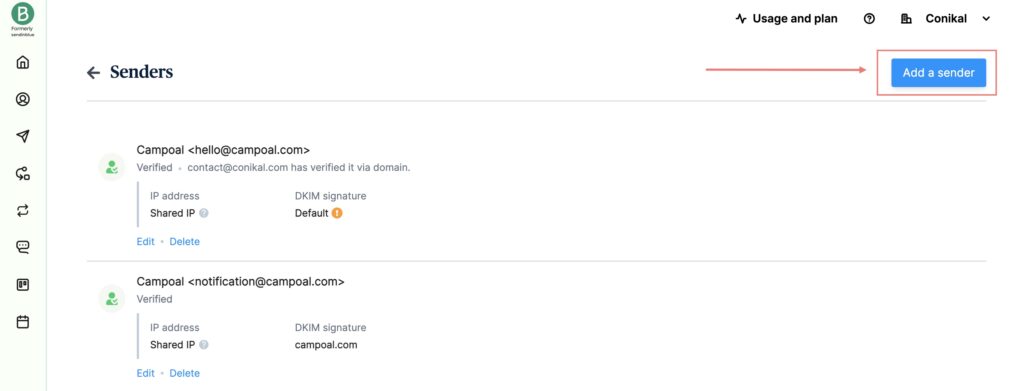
Step 3: Add a new sender On the Senders page, click on the “Add a new sender” button.
Step 4: Enter sender information In the pop-up window that appears, you will be asked to enter the following information:
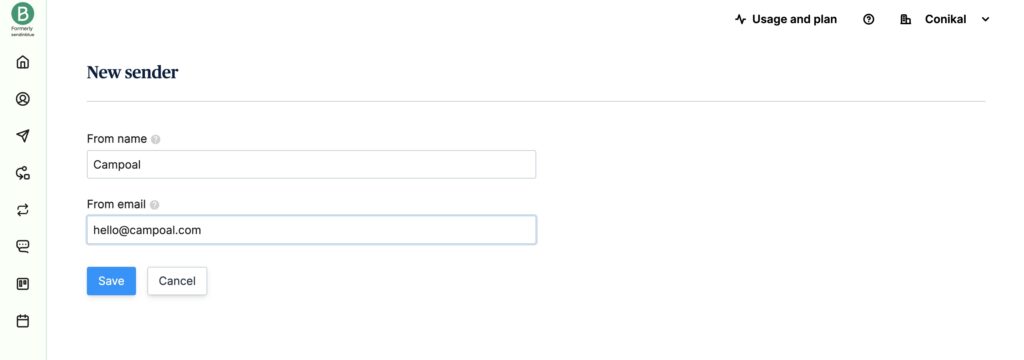
- Sender email address: Enter the email address that you want to use as the sender.
- Sender name: Enter the name that you want to use as the sender (this can be your name or your company name).
- Sender address: Enter the physical mailing address associated with your sender email address. This is required by law in many countries.
Step 5: Verify sender Once you have entered the sender information, click on the “Save” button. Brevo will then send a verification email to the email address you provided. Follow the instructions in the email to complete the verification process.
Step 6: Wait for verification After you have completed the verification process, you will need to wait for Brevo to verify your sender. This process can take up to 48 hours.
Step 7: Use your sender Once your sender has been verified, you can start using it in your email campaigns. When creating a new email campaign, simply select your sender from the list of available senders.
Step 5: Integrate Brevo with Campoal
Now that you have retrieved your Brevo API key, Folder ID and Sender Email, log in to your site and navigate to Theme Options > Authentication > Brevo Email. Click on Enable the “Brevo Save List” options to allow Campoal connect with Brevo.
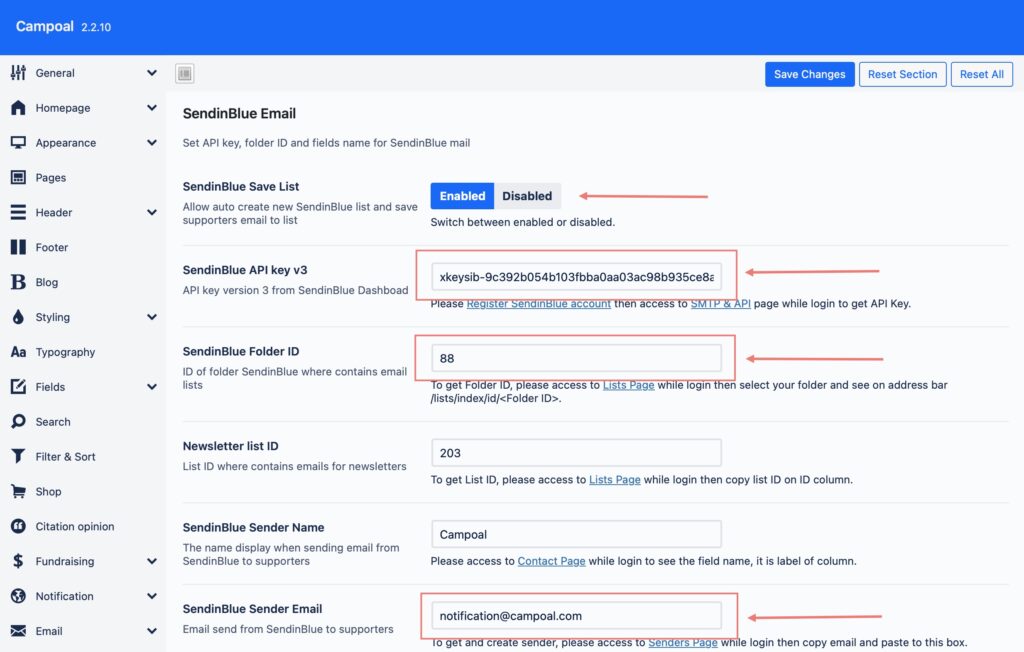
Enter your Brevo API key, Folder ID, and Sender Email into the respective fields and click “Save”. Your site with Campoal is now integrated with Brevo, and you can start sending emails through Brevo using Campoal.
In conclusion, integrating Campoal with Brevo is a straightforward process that can be completed in a few simple steps. By following the above tutorial, you can quickly set up the integration and start sending emails through Brevo using Campoal.