
To run WordPress we recommend your host supports:
- PHP version 7.4 or greater.
- MySQL version 5.7 or greater OR MariaDB version 10.3 or greater.
- HTTPS support
That’s really it. We recommend Apache or Nginx as the most robust and featureful server for running WordPress, but any server that supports PHP and MySQL will do. That said, we can’t test every possible environment and each of the hosts on our hosting page supports the above and more with no problems.
For detailed PHP extension recommendations, see the Hosting Handbook.
Note: If you are in a legacy environment where you only have older PHP or MySQL versions, WordPress also works with PHP 5.6.20+ and MySQL 5.0+, but these versions have reached official End Of Life and as such may expose your site to security vulnerabilities.
PHP settings
A low WordPress upload size limit stops you from uploading large files, plugins, and themes. If you’re building a media-heavy website, that can be a considerable obstacle. It’s necessary to increase the max upload size in WordPress or your server (or both) in such cases.
PHP configuration requirement
upload_max_filesize
128Mpost_max_size
128Mmemory_limit
512Mmax_execution_time
600
Depending on your hosting provider and server, there are many ways to go about solving this issue. We’ll cover them all in this article and show you how to increase the maximum upload size in WordPress quickly.
cPanel
If your hosting provider uses the cPanel dashboard to help you manage your server and site configuration, you can change the max upload file size through its interface.
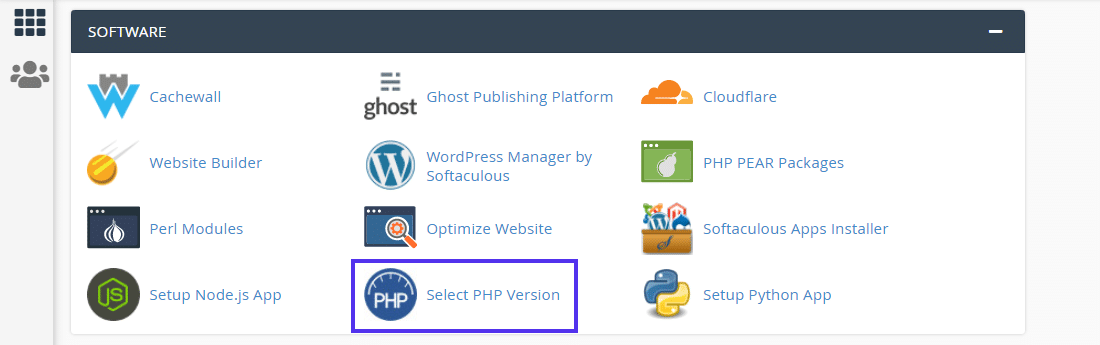
To get started, go to your cPanel dashboard, and select the Select PHP Version under the Software section.
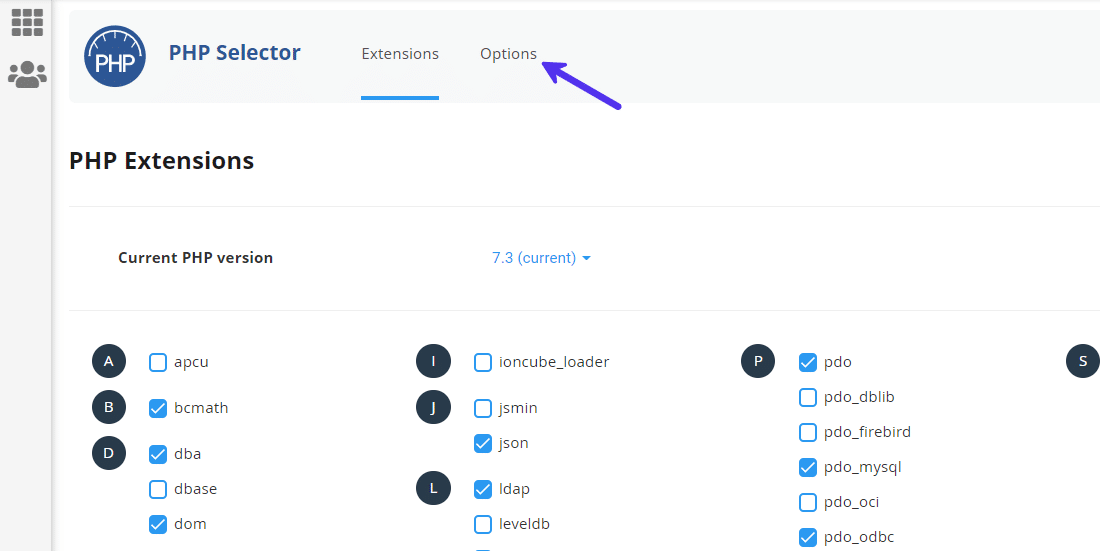
Here, you can change your server’s current PHP version and enable/disable many PHP extensions. Click on the Options link in the navigation menu to go to the PHP Options panel.
Scroll down here to modify the values of PHP directives such as upload_max_filesize, post_max_size, memory_limit, max_execution_time, and max_input_time. The max values you can set here depend on your current hosting plan.
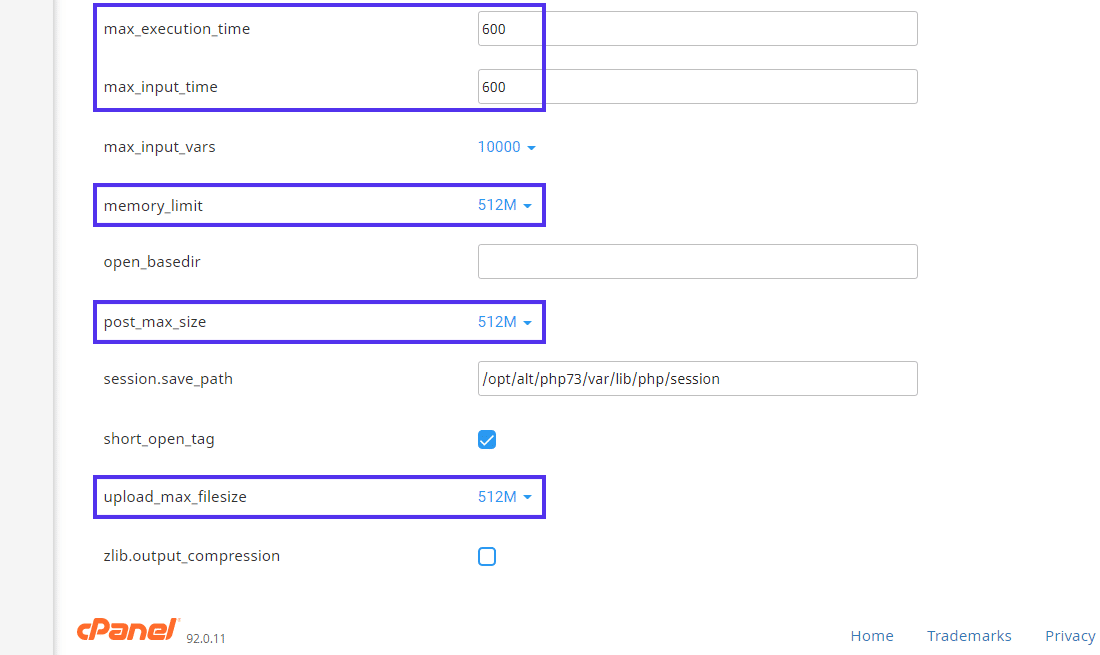
If you have any doubts about these values, we suggest you contact your hosting provider. The latest cPanel dashboard saves changes automatically, so you don’t have to click anything. But if you’re using an older cPanel version, make sure to click the Save Changes button.
Nginx
If you’re running your WordPress site on Nginx, you’ll need to modify both your php.ini and nginx.conf files. We’ve dealt with the former file before. The latter one is called an Nginx config file.
On an Nginx server, you can find the php.ini file at /etc/php/7.4/fpm/php.ini. Depending on which PHP version you’ve installed, the exact path may vary slightly.
upload_max_filesize = 64M
post_max_size = 128M
You don’t have to set the memory_limit in the above file as Nginx handles it differently. For more, you can check out this Stack Overflow thread. After saving your php.ini file, enable the changes by restarting PHP-FPM using the below code in your terminal:
sudo service php7.4-fpm restartAgain, the exact code may vary slightly depending on the PHP version installed on your server.
Next, use Nginx’s client_max_body_size directive to set the new max upload size limit. You need to declare this directive in the nginx.conf file, which you can find at /etc/nginx/nginx.conf.
You can declare this directive inside the http {...} block, the server {...} block, or the location {...} block.
Setting it in the http block will affect all the sites/apps hosted on this server.
http {
    ...
    client_max_body_size 128M;
}
Defining it in the server block will only affect a specific site/app hosted by this server.
server {
    ...
    client_max_body_size 128M;
}
The location block only affects the specified directory (e.g. files, uploads) inside a site/app.
location /files {
    ...
    client_max_body_size 128M;
}
Don’t forget to save the file and restart Nginx to apply the changes. To do that, you can use the following command in your terminal:
sudo service nginx reloadIf you’re a Kinsta client, you can’t access your Nginx config directly. However, you can reach out to our support team, and they can quickly make the changes for you.
Apache
If you’re running your WordPress site on Apache, You need to edit the file called /etc/php/7.0/apache2/php.ini
Type the following command to edit the php.ini:
$ sudo vi /etc/php/7.0/apache2/php.ini
Find and set the following two values:
post_max_size = 128M
upload_max_filesize = 128M
Save and close the file. Where,
- post_max_size = 128M :
- upload_max_filesize = 128M : Maximum allowed size for uploaded files.
Type the following command to restart the Apache2 server:
$ sudo service apache2 restart