Welcome to this step-by-step tutorial on KrispCall, a powerful cloud-based phone system that helps businesses streamline communication with virtual numbers, AI-driven tools, and seamless CRM integrations. Whether you’re a small business owner, a startup founder, or part of a large enterprise, this guide will walk you through setting up and using KrispCall to enhance your communication game. Let’s dive in and get you started with KrispCall’s affordable, feature-packed platform! Ready to try it? Sign up here.
What You’ll Learn in This Tutorial
In this tutorial, we’ll cover:
- What KrispCall is and its key features
- How to sign up and set up your account
- How to configure virtual phone numbers
- How to integrate KrispCall with your CRM
- How to make and manage calls
- How to monitor performance and optimize your setup
- Tips to get the most out of KrispCall
What is KrispCall?
KrispCall is a cloud telephony platform designed to make business communication easy, affordable, and scalable. It offers virtual phone numbers in over 100 countries, allowing you to establish a global presence without expensive hardware. With features like AI-powered call transcription, CRM integrations, and advanced call management tools, KrispCall is perfect for businesses of all sizes.
Key Features
- Global Numbers: Get local, toll-free, mobile, or national numbers in 100+ countries.
- AI Tools: Enjoy automated call transcription, response suggestions, and call summaries.
- CRM Integration: Connect with tools like HubSpot, Pipedrive, and ActiveCampaign.
- Call Management: Use IVR, call forwarding, call recording, and Power Dialer.
- Unified Callbox: Handle calls, SMS, MMS, and voicemails in one interface.
- 24/7 Support: Get help anytime via live chat, email, or phone.
Let’s get started with setting up your KrispCall account!
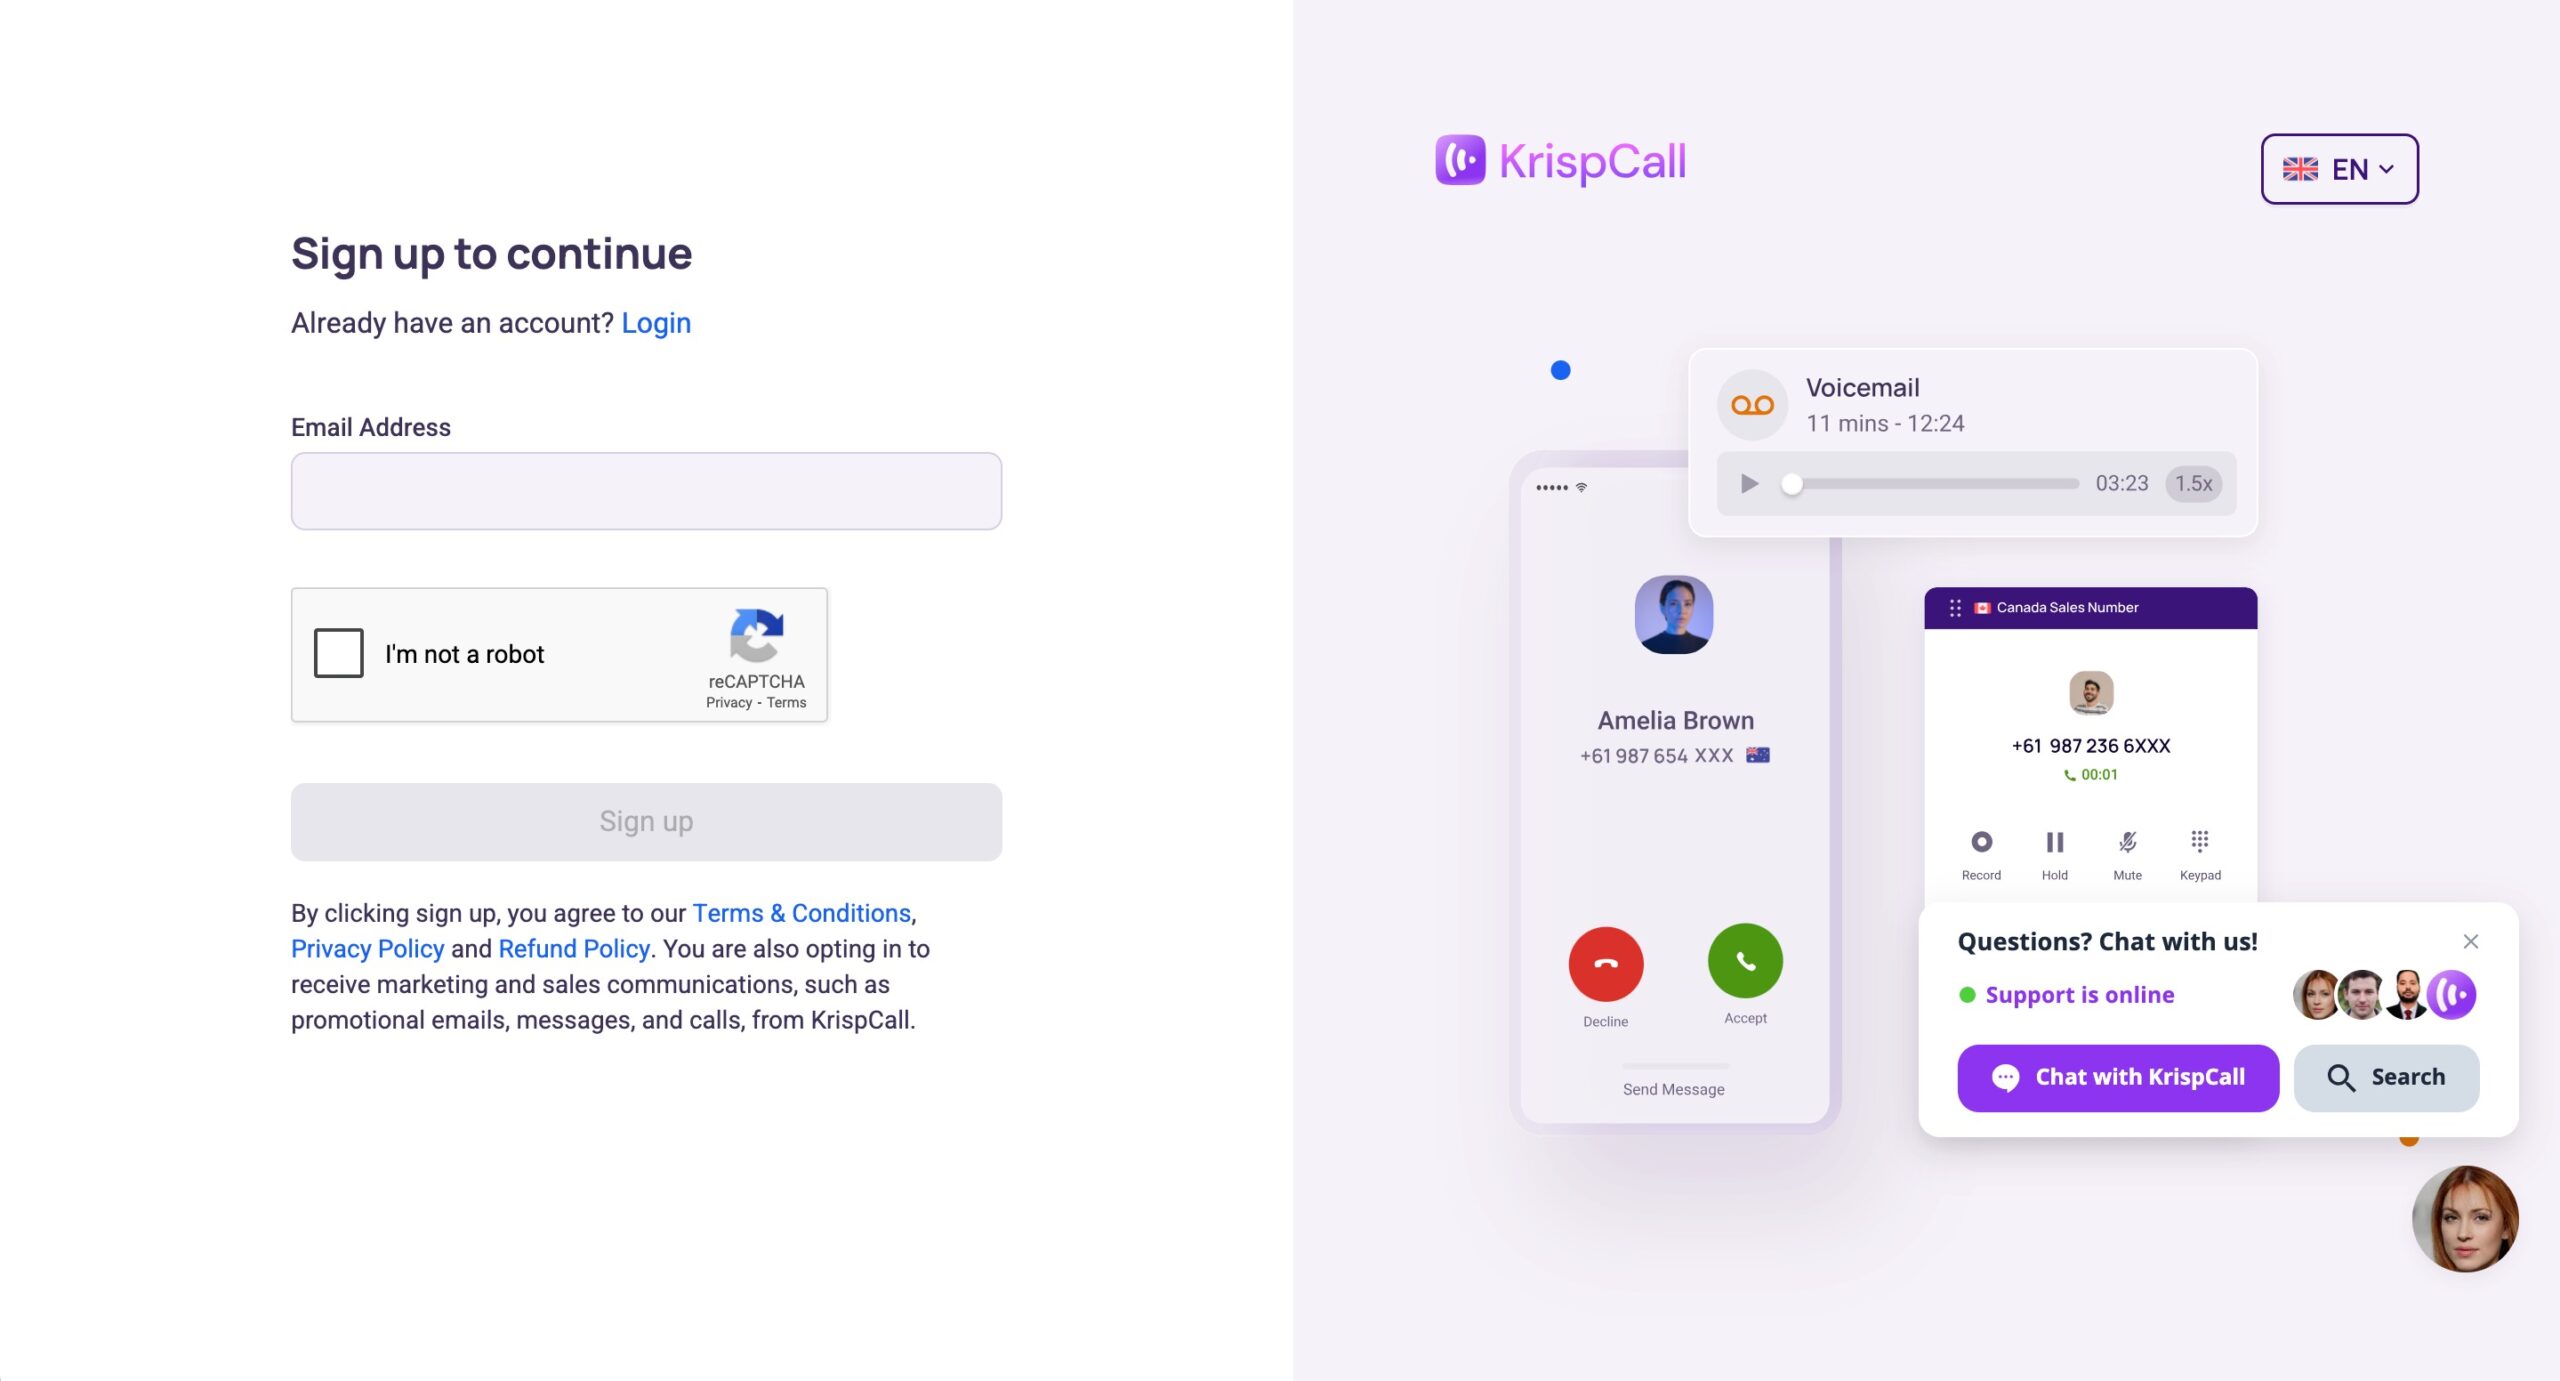
Step 1: Sign Up for KrispCall
To begin using KrispCall, you need to create an account and choose a plan that suits your business.
- Visit the KrispCall Website
Head to KrispCall’s sign-up page and click the “Sign Up” button. You can also select “Book a Demo” to explore the platform with a guided tour. - Create Your Account
Enter your email address and create a secure password. Follow the prompts to complete the registration process. - Choose a Plan
KrispCall offers three plans: Essential, Standard, and Enterprise. Pick the one that aligns with your business needs. Note that KrispCall doesn’t currently offer a free trial, but the demo provides a hands-on preview. - Log In
Once registered, log in to your KrispCall dashboard using your credentials. You’re now ready to set up your virtual phone system!
Step 2: Set Up Your Virtual Phone Number
KrispCall lets you choose virtual numbers from over 100 countries to establish a local or global presence. Here’s how to set it up:
- Navigate to Numbers
From the KrispCall dashboard, go to Settings > My Numbers. - Select a Number
Browse available numbers (local, toll-free, mobile, or national) from your desired country. For example, choose a US local number for a New York-based presence or a UK number for London. - Verify Your Number
Submit the required documentation (e.g., business details) to activate your number. This step ensures compliance with local regulations. - Customize Greetings
Set up professional voicemail greetings, call hold messages, or an Interactive Voice Response (IVR) system to guide callers. For example, record a welcome message like, “Thank you for calling [Your Business]. Press 1 for sales, 2 for support.”
Your number is now ready for calls and texts!
Step 3: Integrate KrispCall with Your CRM
KrispCall integrates with popular CRMs like HubSpot, Pipedrive, and ActiveCampaign to streamline your workflows. Here’s how to set it up:
- Access Integrations
In the dashboard, go to Settings > Integrations. - Connect Your CRM
Select your CRM platform (e.g., HubSpot) and follow the prompts to authenticate the connection. This syncs call logs, messages, and voicemails directly to your CRM. - Install the Dialer Extension
Download the KrispCall Dialer browser extension (available for Chrome) to enable click-to-call functionality within your CRM. For example, click a contact’s number in Pipedrive to initiate a call instantly. - Test the Integration
Make a test call to ensure call data is logged in your CRM. Check for details like call duration and recordings.
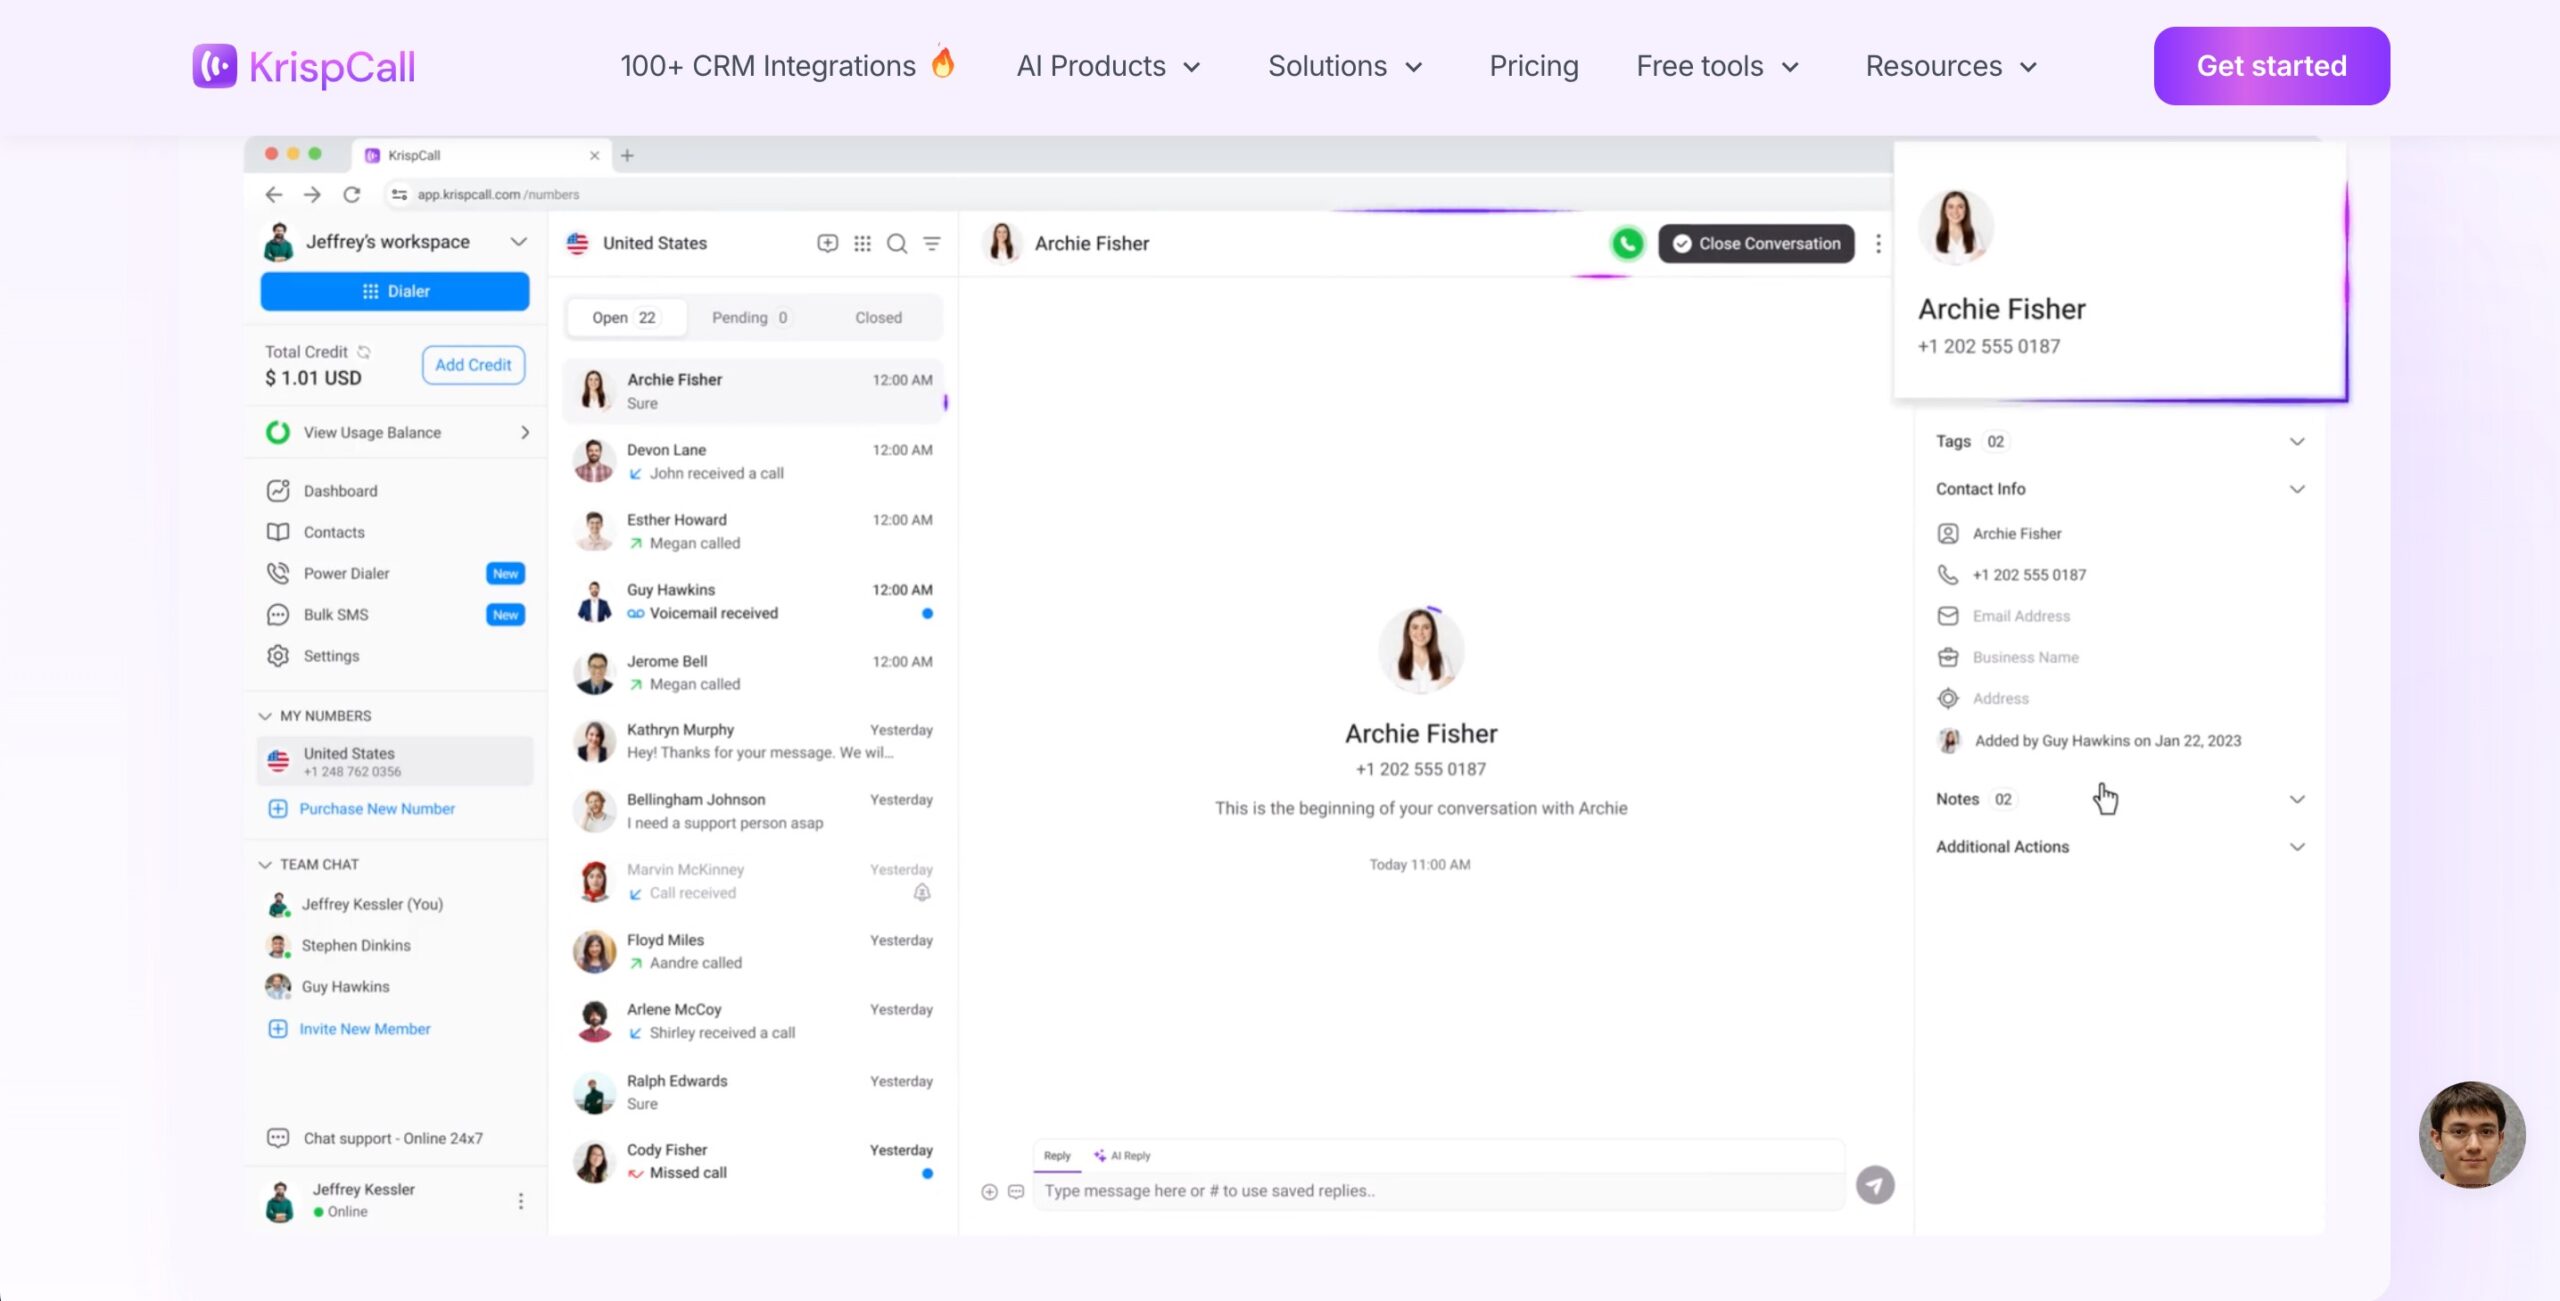
Step 4: Make and Manage Calls
KrispCall’s Unified Callbox makes it easy to handle all communication in one place. Here’s how to use it:
- Access the Unified Callbox
From the dashboard, open the Unified Callbox to manage calls, SMS, MMS, and voicemails. - Make a Call
Enter a contact’s number or select a contact from your CRM. Click the call button to connect. You can use a headset or your device’s microphone. - Enable Call Recording
During a call, click the “Record” button to capture the conversation. Pause recording for sensitive parts if needed (e.g., when discussing payment details). - Use AI Features
Enable AI-powered call transcription to get real-time text of your conversations. Use intelligent response suggestions to handle customer queries efficiently. - Manage Voicemails and Texts
Check voicemails and respond to SMS/MMS directly from the Callbox. For example, reply to a customer’s text inquiry without switching apps.
Step 5: Monitor and Optimize Your Setup
KrispCall provides analytics to track performance and improve communication. Here’s how to use them:
- View Analytics
Go to the Analytics section in the dashboard to see real-time data on call volume, duration, and team performance. - Review Call Summaries
Use AI-generated call summaries to quickly understand key points from conversations. This is great for sales teams to tailor follow-up pitches. - Optimize Workflows
Set up multi-location call centers or use the Power Dialer for high-volume outreach. For example, sales teams can automate dialing to reach more leads faster. - Check Limitations
Note that call analytics are limited to 24 hours by default. Contact KrispCall’s support team to request extended data access if needed.
Tips to Maximize KrispCall
To get the most out of KrispCall, try these best practices:
- Sync with Your CRM: Keep all customer interactions in one place for better follow-ups and personalization.
- Leverage AI Tools: Use transcription and response suggestions to save time and improve customer service.
- Customize Call Flows: Set up IVR and call routing to direct callers to the right department (e.g., “Press 1 for billing”).
- Monitor Regularly: Check analytics weekly to spot trends and train your team on areas for improvement.
- Use the Web Version: The mobile app may lack some features, so use the web platform for full functionality.
Why KrispCall?
KrispCall is affordable, scalable, and packed with features. It requires only an internet connection and a device, saving up to 50% on call costs compared to traditional systems. Its global numbers, AI tools, and CRM integrations make it ideal for startups, remote teams, and enterprises. The only drawbacks are the mobile app’s limited features and the 24-hour analytics window, but these are minor compared to the platform’s benefits.
Wrapping Up
Congratulations! You’re now equipped to use KrispCall to streamline your business communication. From setting up virtual numbers to integrating with your CRM and leveraging AI tools, KrispCall makes it easy to stay connected globally. Ready to get started? Sign up for KrispCall today and take your communication to the next level. Need help? KrispCall’s 24/7 support team is available via live chat, email, or phone.
Happy calling!


Campoal - No.1 Petition & Fundraising WordPress Theme
Campoal is a perfect WordPress theme to create the petition platform with fundraising. Where anyone can be start a social movement, collect supporters and raise funds to change something in society.
Related Articles

The best way to create an online petition website