
DigitalOcean is one of the fastest growing cloud hosting companies in the globe that focuses on simplicity and scale. Today we’re going to learn how to install and configure WordPress on DigitalOcean.
Why use DigitalOcean?
Opening its doors in 2011, it soon became one of the largest cloud hosting providers with over a million users. DigitalOcean servers are known as Droplets – the smallest unit of a cloud server that you can buy starting at $5/month.
The key factor to DigitalOcean’s stupendous success is its simplicity. In addition to being a clean and simple option, there is lots more to love DigitalOcean for your WordPress site. Here are five reasons why we find DigitalOcean to be awesome.
Note: This is an optional section, you can skip it and jump right into the next section to install WordPress in DigitalOcean.
Competitive, Affordable Pricing
DigitalOcean has one of the lowest pricing points in the cloud hosting industry. You can get started with your own server for as little as $5/month.
Three characteristics make DigitalOcean highly affordable.
- Pay-per-hour usage
- No minimum period of renting
- No setup fee (even for large setups)
- Plans start at $0.0007/hour
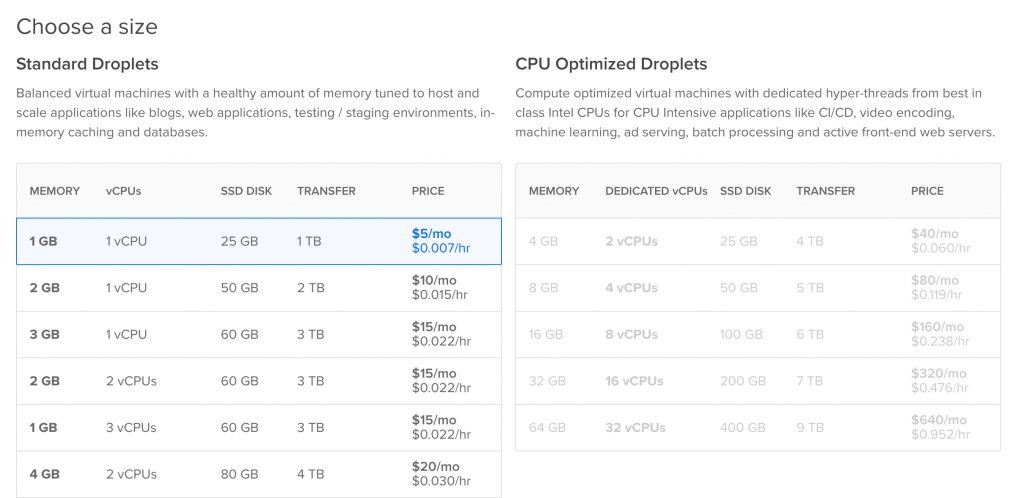
The $5/month droplet comes with:
- 1GB of RAM
- 25GB of SSD storage space (SSDs are about 10x faster than traditional hard disks)
- 1TB of bandwidth (that’s really generous)
- 1 unit of vCPU (virtual CPU) power
- Price: $0.007/hour which is roughly $60/year!
Automatic 1-Click Installer for WordPress
DigitalOcean has a sweet ready-made image for WordPress and a plethora of other open-source software, which makes it an invaluable asset. With a few clicks (you’ll see how) we’ll be able to create steady working installation of WordPress in no time.
Epic Community and Knowledgebase
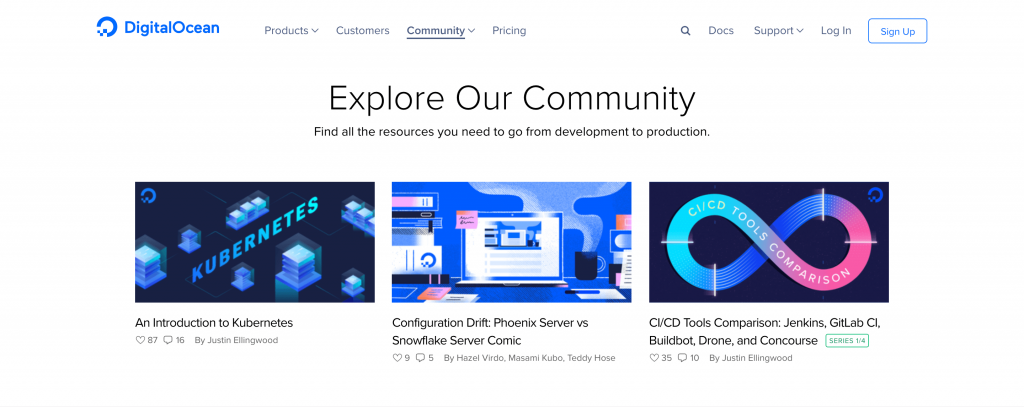
DigitalOcean has a plethora of tutorials on virtually any OS, any software and any (hosting related) topic! The best part – it’s meticulously tested on their droplets in order to ensure it works on your droplet as well!
Apart from tutorials, you also have active Q&A forums and interesting community projects.
Dynamic Resizing
With DigitalOcean, you can dynamically resize your droplet. Remember we talked about it in Introduction to Cloud Computing with WordPress? Whenever you need some extra juice, resizing a droplet as easy as twisting a knob to increase the volume!
Trusted by the Best Developers
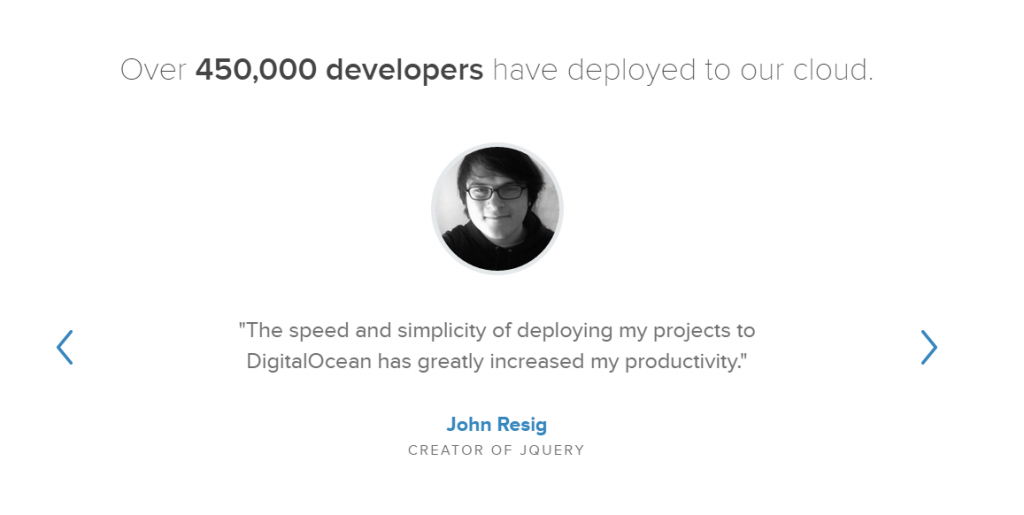
John Resig, creator of jQuery (one of the best JavaScript frameworks), Salvatore Sanfilippo, creator of Redis, and the co-founder of StackExchange, Jeff Atwood – all use DigitalOcean for their projects.
Installing WordPress on DigitalOcean
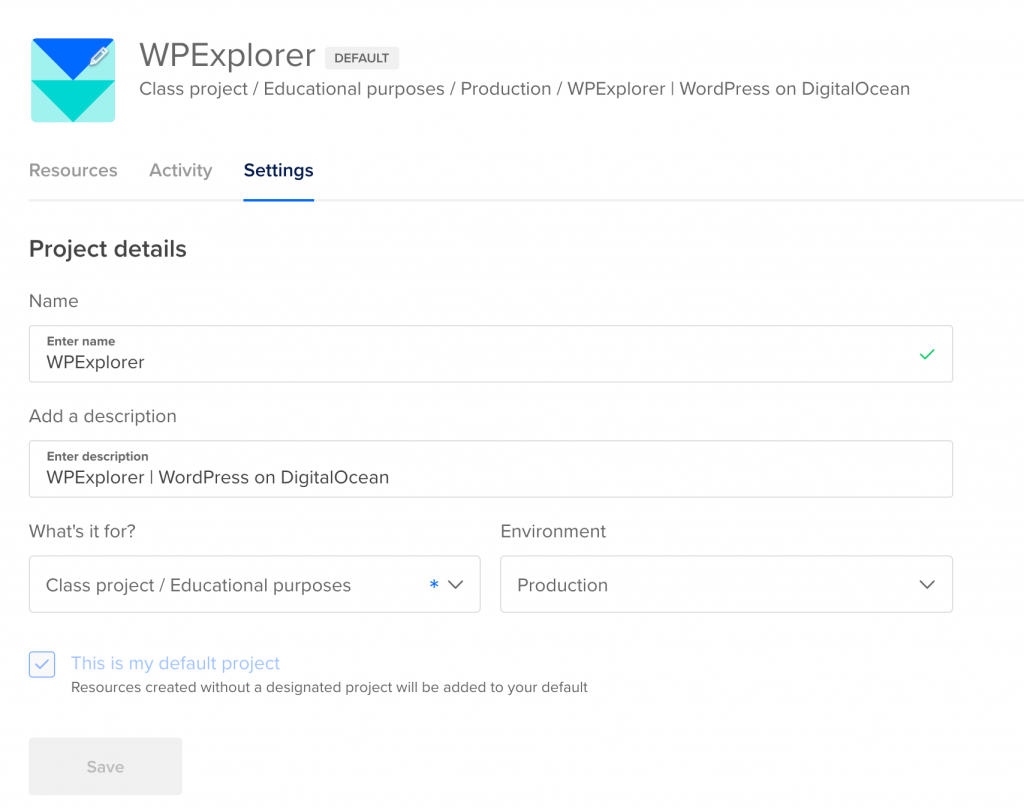
Projects are a basic unit of organization in your DigitalOcean account. Each project can have multiple droplets and other features (such as load balancers and object storage) that DigitalOcean has to offer. A single DigitalOcean account can have multiple projects.
We start by creating our first DigitalOcean project. Select a project name, description, project purpose and environment. An environment can be either Development, Staging or Production. For our tutorial, we’ve chosen the options as shown in the screenshot above.
Since DigitalOcean is a developer focused cloud hosting platform, they have these additional options that go a long way in helping developers organize their projects.
How to Create WordPress Droplet in DigitalOcean
Once you’ve created a project, you can now create a droplet.
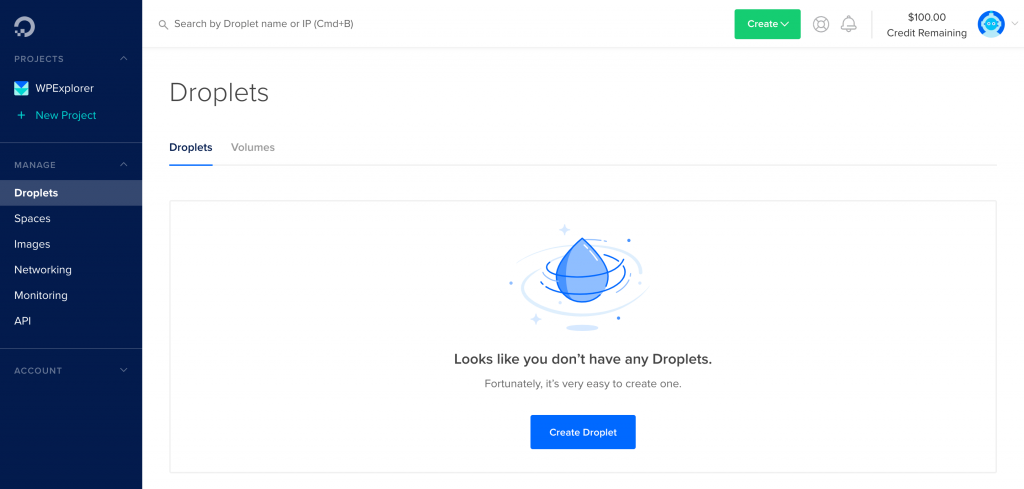
Step 1: We start off by creating a droplet inside the WPExplorer project.
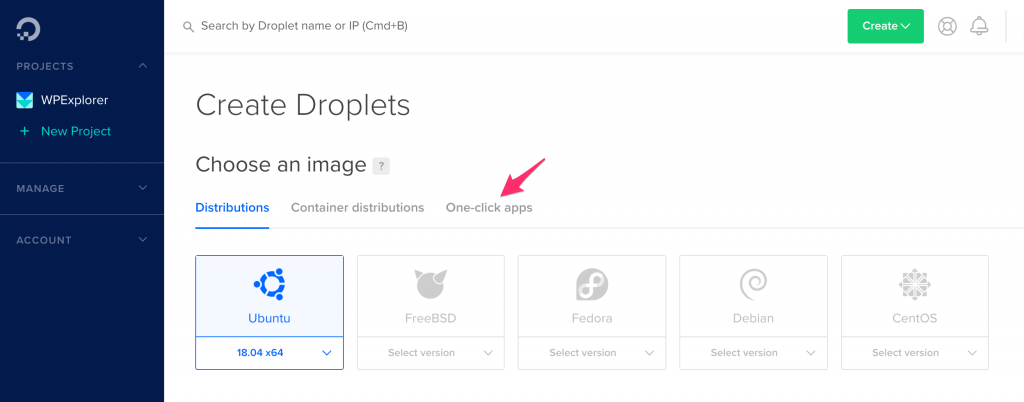
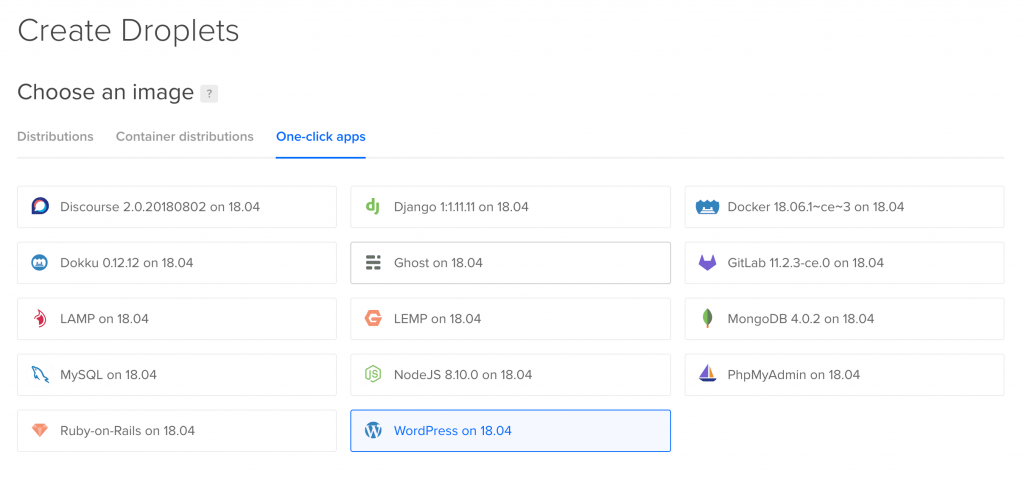
Step 2: Select Ubuntu as your droplet’s OS and then select the One-click apps tab.

Step 3: Select WordPress on 18.04. This means that DigitalOcean is going to automatically install WordPress on Ubuntu 18.04.
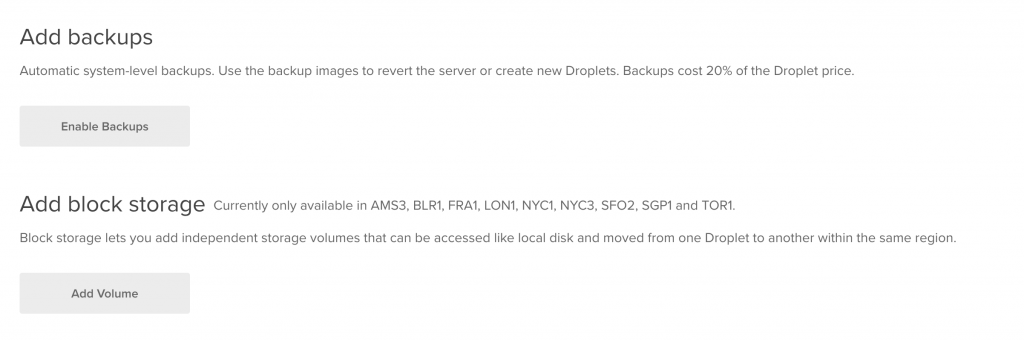
Note – You can additionally add backups to your Droplet. However, this is not important to us since this is a tutorial. Also, this should not be confused with WordPress backups. A droplet backup are automatic system-level backups, which mean they copy everything in the OS (and not just WordPress).
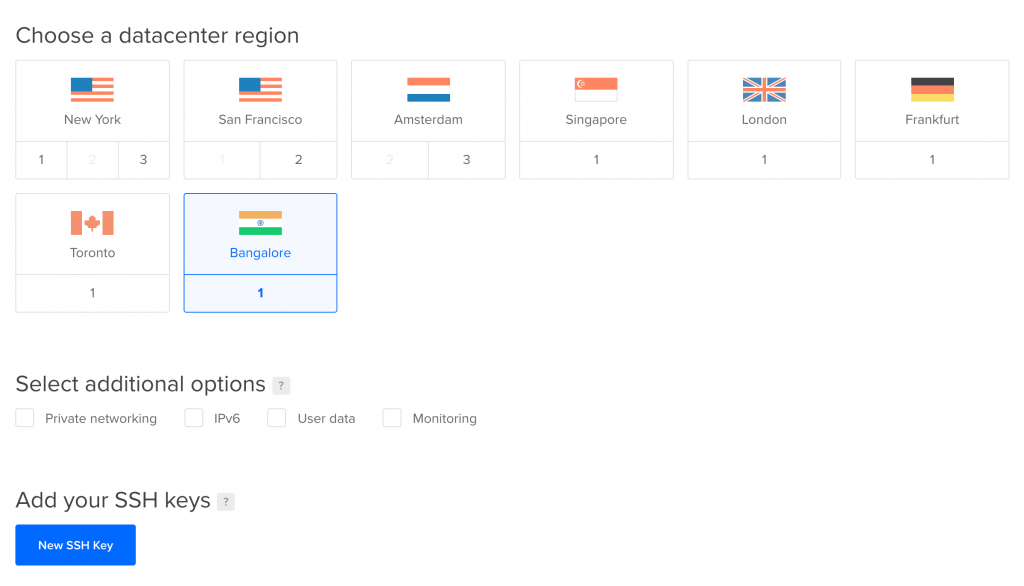
Step 4: DigitalOcean droplets can be deployed across 8 different datacenters. Since I’m located in India, I’ve selected Bangalore. It is optional to select the additional options (such as private network, IPv6, etc.) and an SSH key. Since we’re here to only install WordPress, these features won’t be necessary. However feel free to try them out in your DigitalOcean account!

Step 5: As you can see, the default project, i.e. WPExplorer is automatically selected. Enter a hostname (this is for you to remember internally) and click on Create to start creating your droplet.
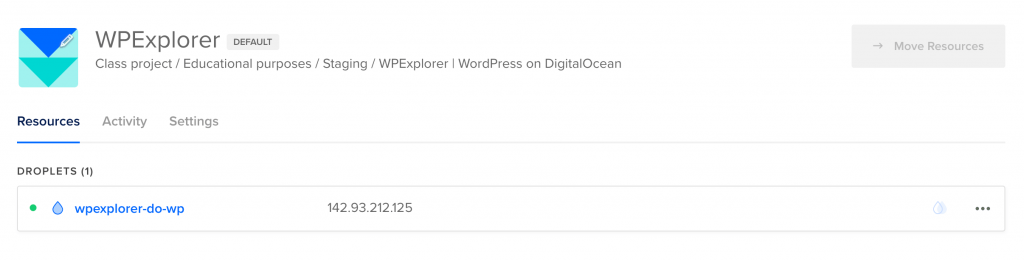
Step 6: Once the droplet is created, you’ll see message similar to the screenshot above.
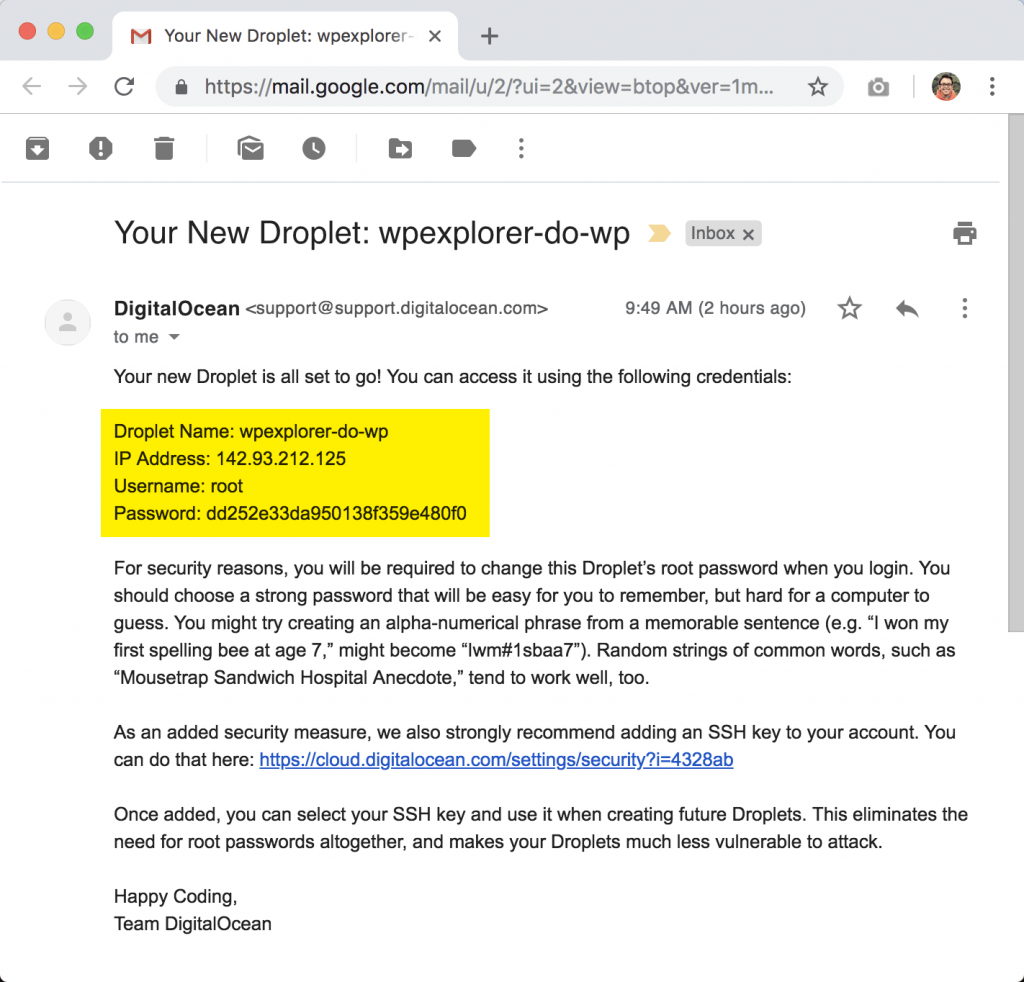
You should also receive a similar email in your registered DigitalOcean email account.
Logging into DigitalOcean droplet via SSH Console
It’s almost time for the famous 5 minute WordPress install. Only this time we’re going to be done within 2 minutes. We already have the IP address that we can use to login to the WordPress server. However, we need to login to our DigitalOcean droplet via SSH for a first-time configuration.
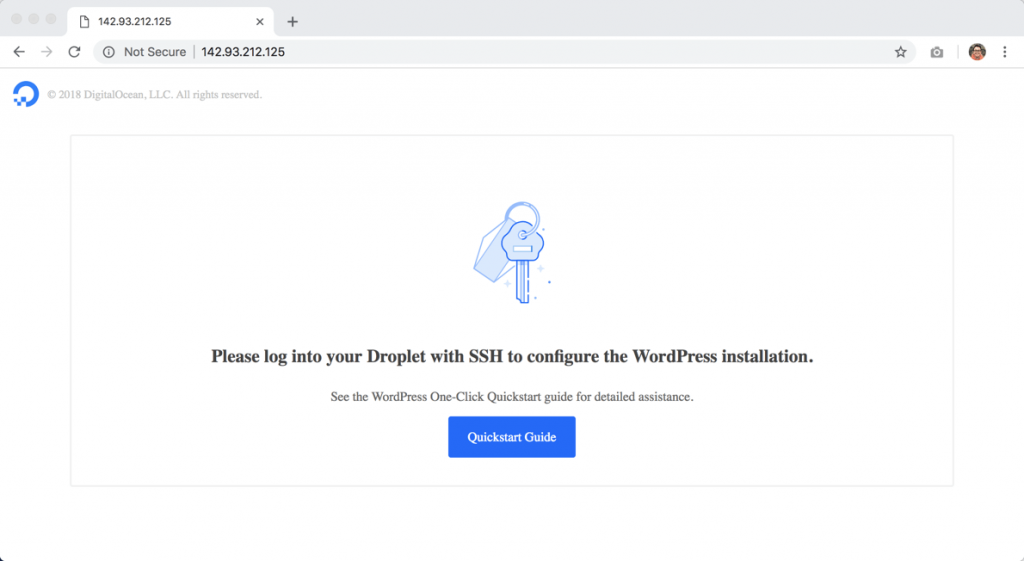
Unless we do that, we’re going to see a message like this when we enter the IP address in our browser. You can login to your DigitalOcean droplet via SSH using Putty in Windows or Terminal in Mac. However, DigitalOcean has an even simpler way to do this, as shown below:
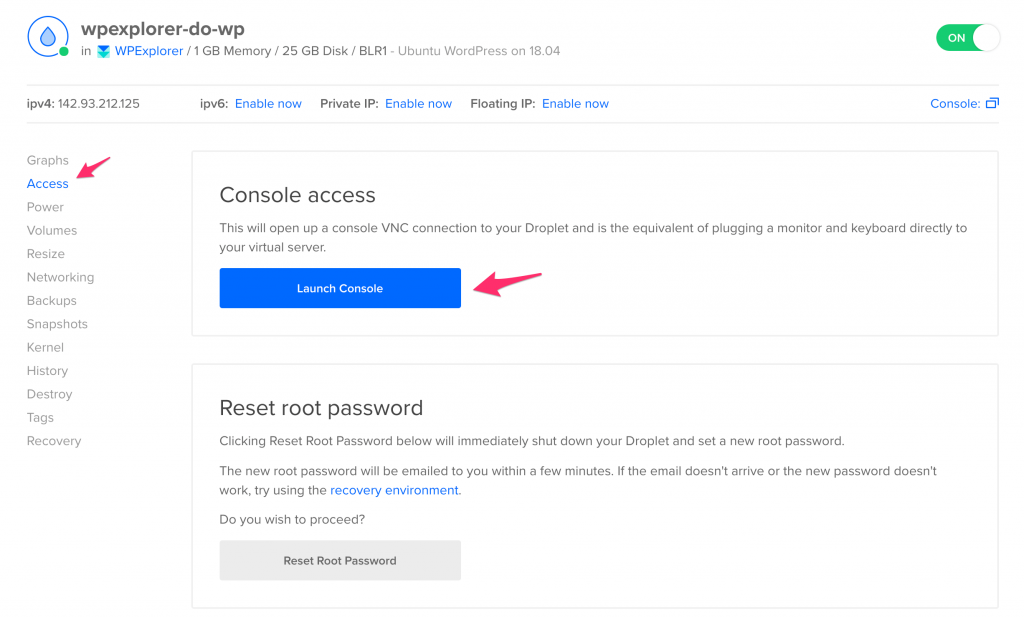
First, from you DigitalOcean dashboard, select your droplet, and then select the Access tab from the left menu. Click on Launch Console to access your droplet via SSH using your web browser.
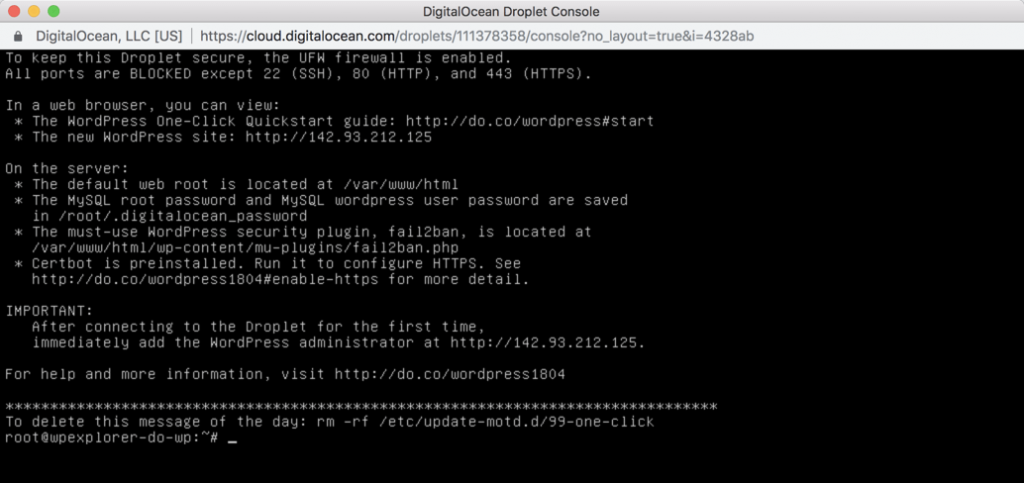
Next, enter your username (root) and password that was emailed to you earlier. You’ll be immediately asked to create a new password for the root user account. Once you’ve reset the root password, you should see a message similar to the one above.
That’s it. We’re now ready for the famous 2-minute WordPress install!
Configuring WordPress installation on DigitalOcean
So far we’ve:
- Created a new DigitalOcean droplet with Ubuntu and WordPress pre-installed; and
- Logged into the droplet via SSH (using DigitalOcean’s built-in console access).
Now we need to do the final steps to get our WordPress site ready.
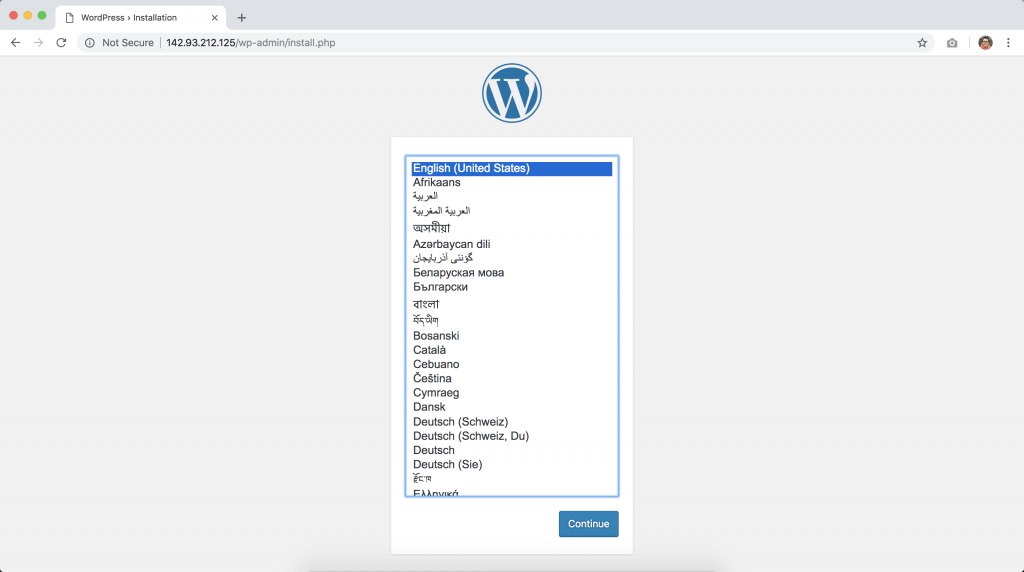
Enter the IP address in your browser, and you should be greeted with the famous install screen.
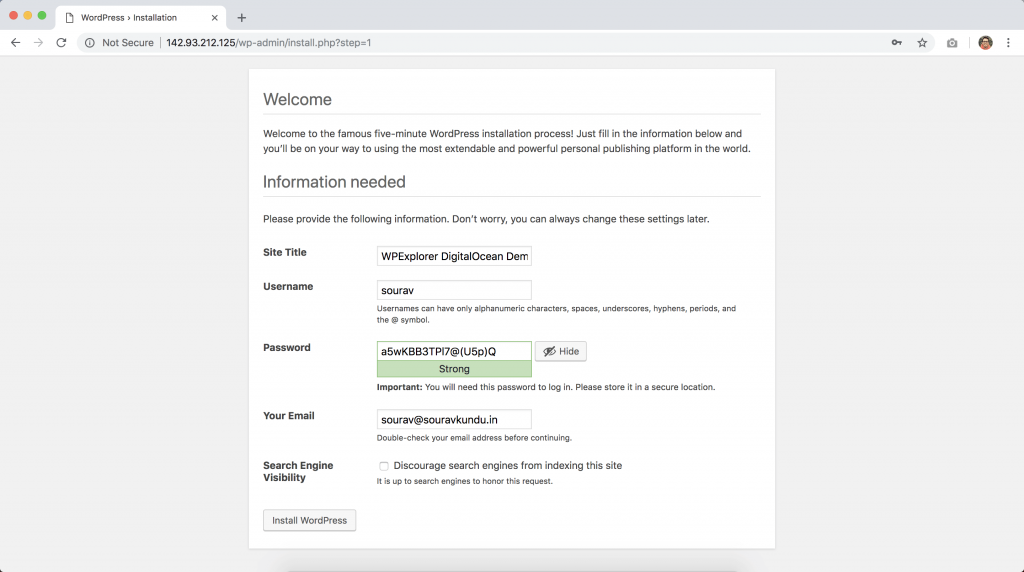
Now select a username, password and email address. The database configuration has been pre-configured by DigitalOcean. You might also want to turn off search engine visibility, if you’re testing a site. Only thing is, you should enable it once your site is ready.
Click on Install WordPress and let the magic happen.
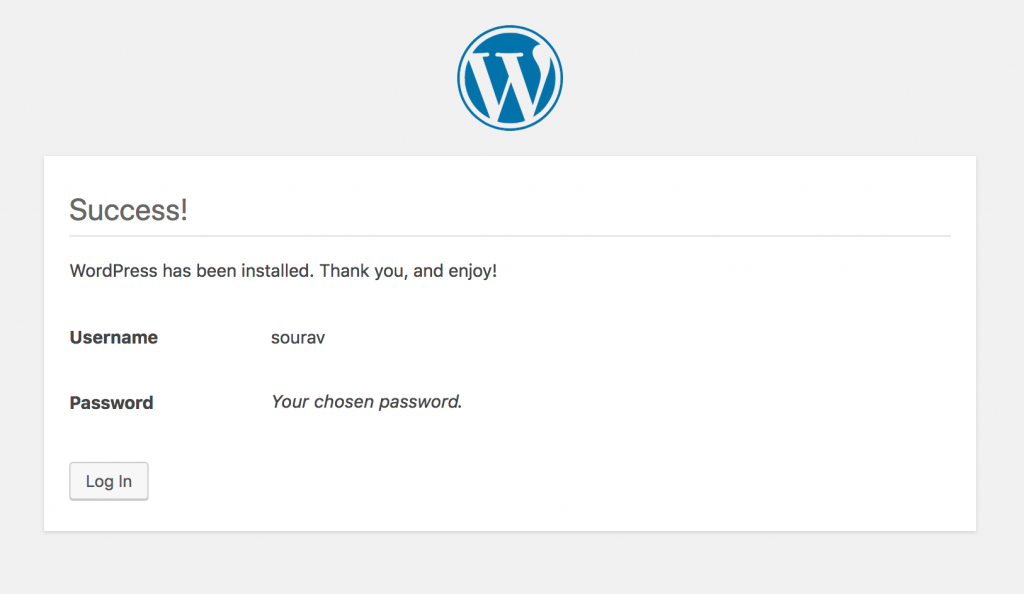
And there you have it – WordPress is ready.
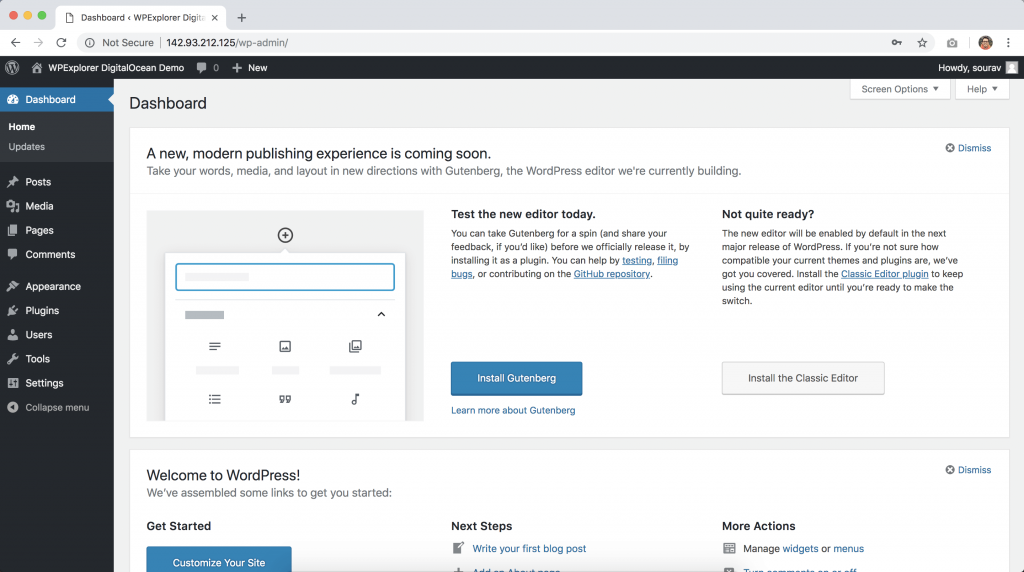
This marks the end of our basic tutorial.
Bonus: DigitalOcean For Beginners (Another Cloud Option)
Remember when we did our Cloudways hosting review a while back? Well one of the cool features that Cloudways offers is the option to choose your cloud, and one of the choices is DigitalOcean! Since Cloudways does all the heavy lifting for you, you can just point click and get started hosting your website so you can had all the awesome benefits of cloud hosting with DigitalOcean minus the setup. This makes Cloudways a great option for newbies or for people who don’t want to dig into the technical aspect of setting up cloud hosting.
How to Add Domains
Adding a domain you own to your DigitalOcean account lets you manage the domain’s DNS records with the control panel and API. Domains you manage on DigitalOcean also integrate with DigitalOcean Load Balancers and Spaces to streamline automatic SSL certificate management.
To add a domain from the control panel, open the Create menu and click Domains/DNS.
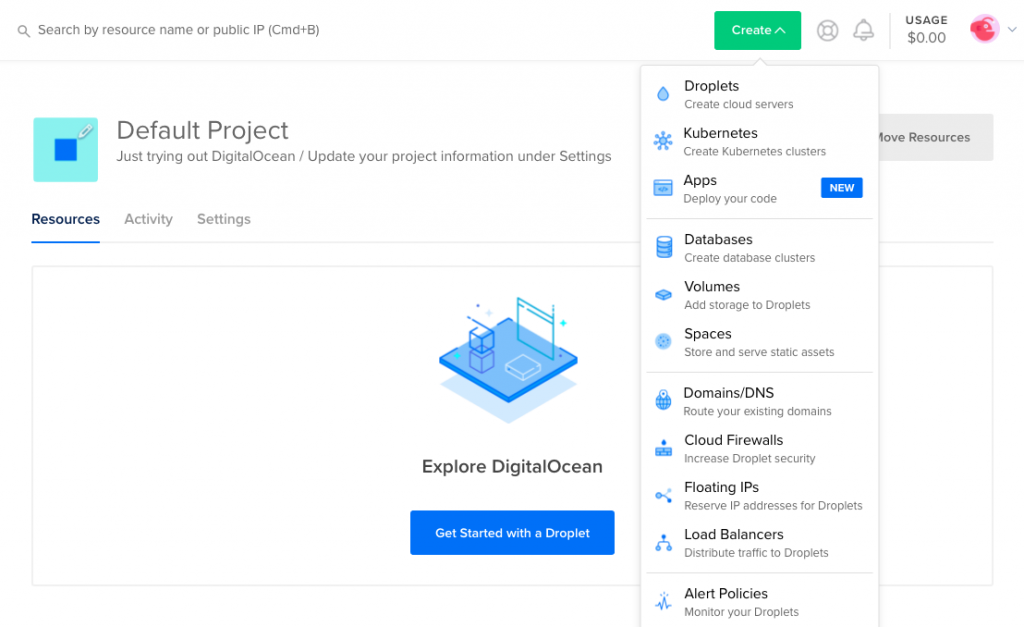
This brings you to the Networking section’s Domains tab. Enter your domain into the Enter domain field, then click Add Domain.
DigitalOcean’s terms of service prohibit adding country code top-level domains (ccTLDs) from OFAC-sanctioned countries. For more information, including a list of countries, see section 5.7 of our Rules of Conduct in our terms of service.
The system performs a DNS lookup to see if the domain has already been added to DigitalOcean. If it has, you’ll receive a message that says Data domain example.com: Name already exists. If the domain has not been previously added to DigitalOcean’s DNS service, it will be added.
Domains you’ve added are listed on the Domains page.

Once you’ve added a domain, click its name to view and modify its DNS records.
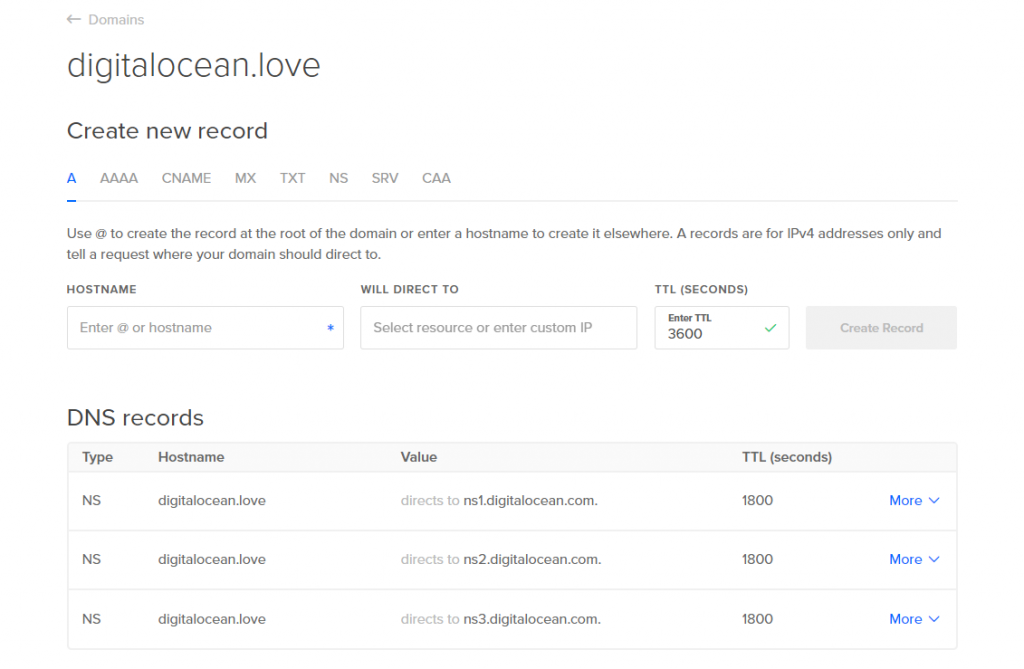
You can add records in the Create a new record section. The DNS records section lists any existing records for the domain, and you can modify or delete records from the record’s More menu.
Add Record
A Records
An A record maps an IPv4 address to a domain name. This determines where to direct any requests for a domain name.
On DigitalOcean, A records have the following fields.
- HOSTNAME, which can be set to:
- The apex domain (
@). To map a apex domain, likeexample.com, to an IPv4 address, enter the@symbol. - A subdomain prefix (e.g.
www). To create a subdomain, enter the subdomain prefix. For example, to createwww.example.com, you would enterwww. - A wildcard (
*). To direct requests for a non-existent subdomain to a server or load balancer, enter*. However, if any kind of DNS record exists for a hostname, the wildcard will not apply; you will need to explicitly create an A record for it.
- The apex domain (
- WILL DIRECT TO, which can be set to:
- A DigitalOcean Droplet or Load Balancer by typing its name and selecting it from the menu.
- A non-DigitalOcean resource by entering its IP address.
Setting an A record using DigitalOcean DNS looks like this:
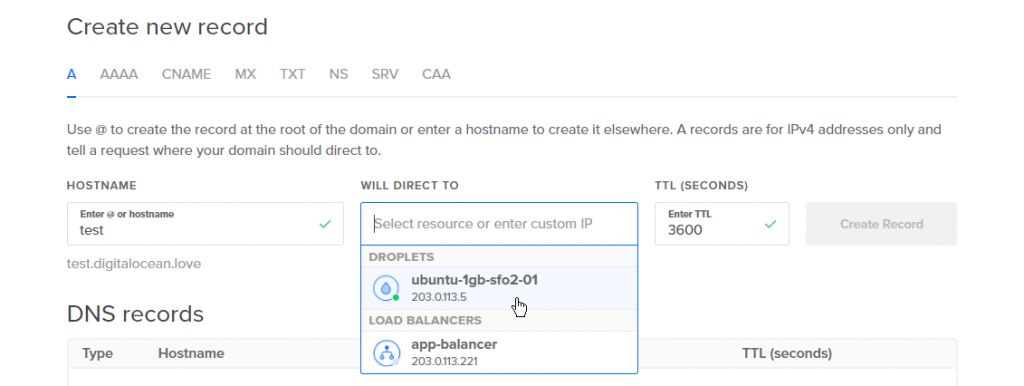
In this example, we entered the subdomain prefix test for the hostname. This will make DNS lookups for test.digitalocean.lovewill redirect to the Droplet we’ve chosen named ubuntu-1gb-sfo2-01 with the IP address 203.0.113.5.
It is possible to add multiple records for the same DNS entry, each pointing to a different IP address. This supports a load distribution and balancing strategy known as Round Robin DNS.
AAAA Records
An AAAA record, also called a Quad A record, maps an IPv6 address to a domain name. This determines where to direct requests for a domain name in the same way that an A record does for IPv4 addresses.
On DigitalOcean, AAAA records have the following fields.
- HOSTNAME, which can be set to:
- The apex domain (
@). To map a apex domain, likeexample.com, to an IPv6 address, enter the@symbol. - A subdomain prefix (e.g.
www). To create a subdomain, enter the subdomain prefix. For example, to createwww.example.com, you would enterwww. - A wildcard (
*). To direct requests for a non-existent subdomain to a server or load balancer, enter*. However, if any kind of DNS record exists for a hostname, the wildcard will not apply; you will need to explicitly create an AAAA record for it.
- The apex domain (
- WILL DIRECT TO, which can be set to:
- A DigitalOcean Droplet by typing its name and selecting it from the menu. All Droplets will be displayed on the list, but only those with IPv6 addresses can be selected. DigitalOcean Load Balancers do not currently support IPv6.
- A non-DigitalOcean resource by entering its IPv6 address.
Setting an AAAA record using DigitalOcean DNS looks like this:
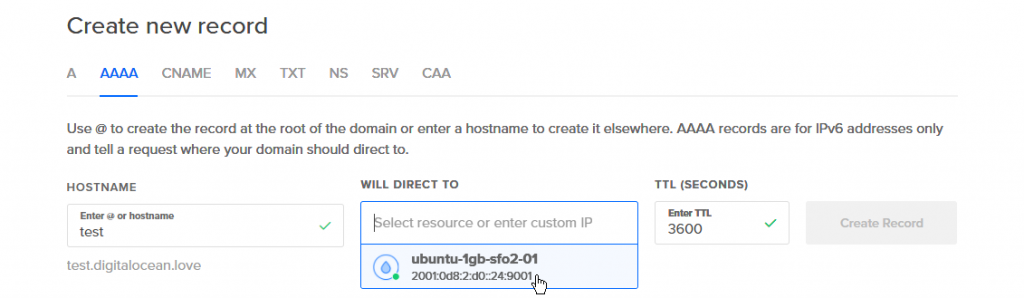
In this example, we entered the subdomain prefix test for the same hostname from the A record example, digitalocean.love. This will make DNS lookups for test.digitalocean.love will redirect to the Droplet we’ve chosen named ubuntu-1gb-sfo2-01 with the IP address 2001:0d8:2:d0::24:9001.
CNAME Records
A CNAME record defines an alias for an A record; it points one domain to another domain instead of to an IP address. When the associated A record’s IP address changes, the CNAME will follow to the new address.
On DigitalOcean, CNAME records have the following fields.
- HOSTNAME, which should be set to the subdomain prefix for the new alias you want to create.
- IS AN ALIAS OF, which should be set to the hostname where the alias should point. For the alias to work, the hostname must have an A record or be handled by a wildcard A record. This can be:
- The apex domain (
@). To map a apex domain, likeexample.com, enter the@symbol. - A subdomain (e.g.
site.example.com).
- The apex domain (
Setting an CNAME record using DigitalOcean DNS looks like this:
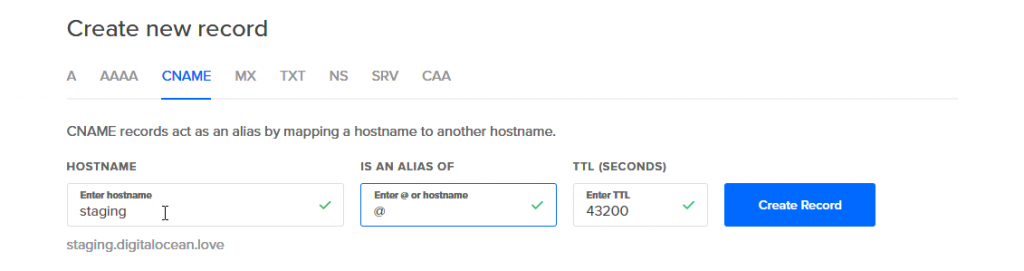
In this example, we entered the subdomain prefix staging for the hostname and @ for the hostname to redirect to. This will make DNS lookups for staging.digitalocean.love will redirect to the apex domain, digitalocean.love.
Adding HTTPS to WordPress using DigitalOcean
Setting up an SSL certificate enables HTTPS on the web server, which secures the traffic between the server and the clients connecting to it. DigitalOcean pre-installs a tool called Certbot in the one-click WordPress install droplet. Certbot is a free and convenient way to set up SSL certificates on a server.
We’ll now look at how to configure Certbot in DigitalOcean to add HTTPS to your WordPress site.
According to DigitalOcean’s documentation, to use Certbot, you’ll need a registered domain name and two DNS records:
- An A record from the domain (e.g., example.com) to the server’s IP address
- An A record from the domain prefaced with www (e.g., www.example.com) to the server’s IP address.
This is very similar to the part 1 of the DNS configuration section. And guess what? We’ve already done it!
Once this step is done, we’ll need to login to the droplet’s console via SSH and run the following command:
certbot --apache -d example.com -d www.example.com
Only thing is example.com is replaced with your domain name. In our tutorial, since we’re only using a subdomain, the command is going to be:
certbot --apache -d digitalocean.souravkundu.in
- There are going to be a couple of prompts when the command is running. Simply agree to them by entering ‘Y’ on the console.
- You’ll also be asked if you want to redirect all HTTP traffic to the HTTPS version of the website. I would recommend selecting yes, since this ensures that all your visitors get the encrypted version of your website.
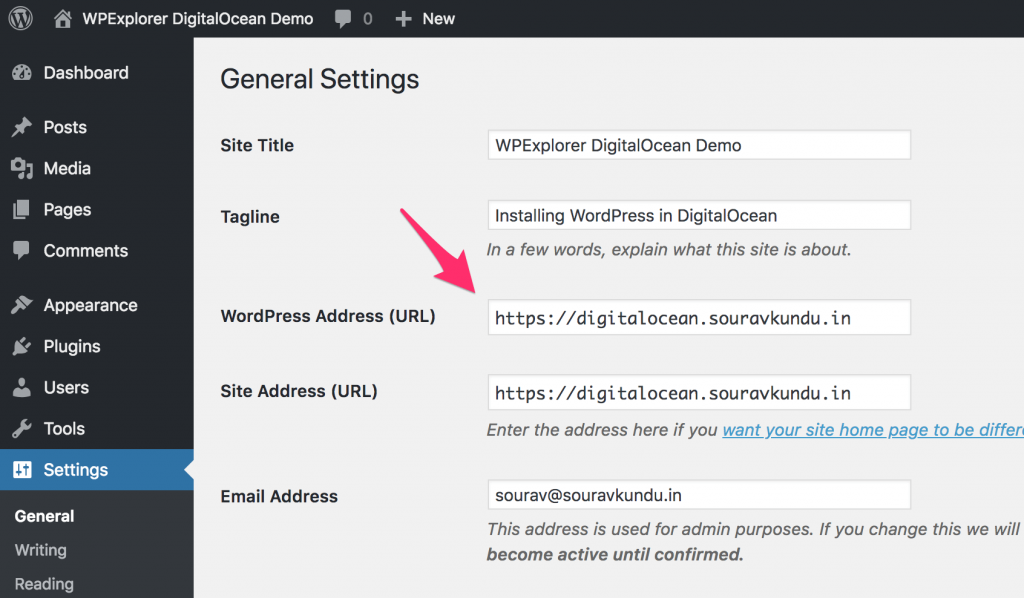
- Once done, you’ll have to go back to the WordPress dashboard and change the site URL from http to https, as shown in the screenshot below.
DigitalOcean is one of the finest examples of developer-friendly cloud hosting providers out there. They have extensive documentation including a dedicated page for WordPress and ticket-based support system. Powered by intuitive design, user-centric guides and robust features, DigitalOcean is changing the face of cloud hosting – one droplet at a time. And with a $5/month entry point, it’s an excellent place to learn how to get your hands dirty with WordPress.